

There are several OpenShift resources related to authentication and authorization. The following is a list of the primary resource types and their definitions:
- User – In the OpenShift Container Platform architecture, users are entities that interact with the API server. Assign permissions by adding roles to the user directly or to the groups of which the user is a member.
- Identity – The identity resource keeps a record of successful authentication attempts from a specific user and identity provider. Any data concerning the source of the authentication is stored on the identity. Only a single user resource is associated with an identity resource.
- Service Account – In OpenShift, applications can communicate with the API independently when user credentials cannot be acquired. To preserve the integrity of a regular user’s credentials, credentials are
not shared and service accounts are used instead. Service accounts enable you to control API access without the need to borrow a regular user’s credentials. - Group – Groups represent a specific set of users. Users are assigned to one or to multiple groups. OpenShift Container Platform also provides system groups or virtual groups that are provisioned automatically by the cluster.
- Role – A role defines a set of permissions that enables a user to perform API operations over one or more resource types. You grant permissions to users, groups, and service accounts by assigning roles to them.
User and identity resources are usually not created in advance. They are usually created automatically by OpenShift after a successful interactive log in using OAuth.
OpenShift OAuth server can be configured to use many identity providers. The following lists includes the more common ones:
- HTPasswd – Validates user names and passwords against a secret that stores credentials generated using the htpasswd command.
- Keystone – Enables shared authentication with an OpenStack Keystone v3 server.
- LDAP – Configures the LDAP identity provider to validate user names and passwords against an LDAPv3 server, using simple bind authentication.
- GitHub or GitHub Enterprise – Configures a GitHub identity provider to validate user names and passwords against GitHub or the GitHub Enterprise OAuth authentication server.
- OpenID Connect – Integrates with an OpenID Connect identity provider using an Authorization Code Flow.
The OAuth custom resource must be updated with your desired identity provider. You can define multiple identity providers, of the same or different kinds, on the same OAuth custom resource.
Authenticating as a Cluster Administrator
Before you can configure an identity provider and manage users, you must access your OpenShift cluster as a cluster administrator. A newly-installed OpenShift cluster provides two ways to authenticate API requests with cluster administrator privileges:
• Use the kubeconfig file, which embeds an X.509 client certificate that never expires.
• Authenticate as the kubeadmin virtual user. Successful authentication grants an OAuth access token.
To create additional users and grant them different access levels, you must configure an identity provider and assign roles to your users.
- Authenticating Using the X.509 Certificate
Thekubeconfigfile contains specific details and parameters used by the CLI to connect a client to the correct API server, including an X.509 certificate.
The installation logs provide the location of thekubeconfigfile:
|
1 |
INFO Run 'export KUBECONFIG=/root/auth/kubeconfig' to manage the cluster with 'oc'. |
To use the kubeconfig file to authenticate oc commands, you must copy the file to your workstation and set the absolute or relative path to the KUBECONFIG environment variable. Then, you can run any oc that requires cluster administrator privileges without logging in to OpenShift.
|
1 2 |
[user@host ~]$ export KUBECONFIG=/path/to/kubeconfig [user@host ~]$ oc get nodes |
As an alternative, you can use the --kubeconfig option of the oc command.
|
1 |
[user@host ~]$ oc --kubeconfig /path/to/kubeconfig get nodes |
- Authenticating Using the kubeadmin Virtual User
After installation completes, OpenShift creates thekubeadminvirtual user. Thekubeadminsecret in the kube-system namespace contains the hashed password for thekubeadminuser. The kubeadmin user has cluster administrator privileges. The OpenShift installer dynamically generates a unique kubeadmin password for the cluster. The installation logs provide the kubeadmin credentials used to log in to the cluster. The cluster
installation logs also provide log in, password, and the URL for console access.
|
1 2 3 4 5 6 |
...output omitted... INFO The cluster is ready when 'oc login -u kubeadmin -p shdU_trbi_6ucX_edbu_aqop' ...output omitted... INFO Access the OpenShift web-console here: https://console-openshift-console.apps.ocp4.example.com INFO Login to the console with user: kubeadmin, password: shdU_trbi_6ucX_edbu_aqop |
Deleting the Virtual User
After you define an identity provider, create a new user, and assign that user the cluster-admin role, you can remove the kubeadmin user credentials to improve cluster security.
|
1 |
[user@host ~]$ oc delete secret kubeadmin -n kube-system |
If you delete the kubeadmin secret before you configure another user with cluster admin privileges, then the only way you can administer your cluster is using the kubeconfig file. If you do not have a copy of this file in a safe location, then you cannot recover administrative access to your cluster. The only alternative is destroying and reinstalling your cluster.
Configuring the HTPasswd Identity Provider
The HTPasswd identity provider validates users against a secret that contains user names and passwords generated with the htpasswd command from the Apache HTTP Server project. Only a cluster administrator can change the data inside the HTPasswd secret. Regular users cannot change their own passwords. Most production environments require a more
powerful identity provider that integrates with the organization’s identity management system.
Configuring the OAuth Custom Resource
To use the HTPasswd identity provider, the OAuth custom resource must be edited to add an entry to the .spec.identityProviders array:
|
1 2 3 4 5 6 7 8 9 10 11 12 |
apiVersion: config.openshift.io/v1 kind: OAuth metadata: name: cluster spec: identityProviders: - name: my_htpasswd_provider mappingMethod: claim type: HTPasswd htpasswd: fileData: name: htpasswd-secret |
name: my_htpasswd_provider– This provider name is prefixed to provider user names to form an identity name.mappingMethod: claim– Controls how mappings are established between provider identities and user objects.name: htpasswd-secret– An existing secret containing data generated using thehtpasswdcommand.
To update the OAuth custom resource, use the oc get command to export the existing OAuth cluster resource to a file in YAML format.
[user@host ~]$ oc get oauth cluster -o yaml > oauth.yaml
Then, open the resulting file in a text editor and make the needed changes to the embedded identity provider settings. After completing modifications and saving the file, you must apply the new custom resource using
the oc replace command.
|
1 |
[user@host ~]$ oc replace -f oauth.yaml |
Managing Users with the HTPasswd Identity Provider
Managing user credentials with the HTPasswd Identity Provider requires creating a temporary htpasswd file, making changes to the file, and applying these changes to the secret.
- Creating an HTPasswd File
The httpd-tools package provides the htpasswd utility, it must be installed and available on your system. Create the htpasswd file.
|
1 |
[user@host ~]$ htpasswd -c -B -b /tmp/htpasswd student redhat123 |
Use the -c option only when creating a new file. The -c option replaces all file content if the file already exists.
Add or update credentials:
|
1 |
[user@host ~]$ htpasswd -b /tmp/htpasswd student redhat1234 |
Delete credentials:
|
1 |
[user@host ~]$ htpasswd -D /tmp/htpasswd student |
- Creating the HTPasswd Secret
To use theHTPasswdprovider, you must create a secret that contains thehtpasswdfile data. The following example uses a secret named htpasswd-secret.
12[user@host ~]$ oc create secret generic htpasswd-secret \> --from-file htpasswd=/tmp/htpasswd -n openshift-config - Extracting Secret Data
When adding or removing users, an administrator cannot assume the validity of a localhtpasswdfile. Moreover, the administrator might not be on a system that has the htpasswd file. In a real world scenario, it would behoove the administrator to use theoc extractcommand. By default, theoc extractcommand saves each key within a configuration map or secret as a
separate file. Alternatively, all data can then be redirected to a file or displayed as standard output. To extract data from thehtpasswd-secretsecret to the/tmp/directory, use the following command. The--confirmoption replaces the file if it already exists.
|
1 2 |
[user@host ~]$ oc extract secret/htpasswd-secret -n openshift-config \ > --to /tmp/ --confirm /tmp/htpasswd |
- Updating the HTPasswd Secret
The secret must be updated after adding, changing, or deleting users. Use the oc set data secret command to update a secret. The following command updates thehtpasswd-secretsecret using the content of the/tmp/htpasswdfile.
|
1 2 |
[user@host ~]$ oc set data secret/htpasswd-secret \ > --from-file htpasswd=/tmp/htpasswd -n openshift-config |
After updating the secret, the OAuth operator redeploys pods in the openshiftauthentication namespace. Monitor the redeployment of the new OAuth pods by running:
|
1 2 |
[user@host ~]$ watch oc get pods -n openshift-authentication Test additions, changes, or deletions to the secret after the new pods finish deploying. |
Test additions, changes, or deletions to the secret after the new pods finish deploying.
Deleting Users and Identities
When a scenario occurs that requires you to delete a user, it is not sufficient to delete the user from the identity provider. The user and identity resources must also be deleted. You must remove the password from the htpasswd secret, remove the user from the local htpasswd file, and then update the secret.
To delete the user from htpasswd, run the following command:
|
1 |
[user@host ~]$ htpasswd -D /tmp/htpasswd manager |
Update the secret to remove all remnants of the user’s password:
|
1 2 |
[user@host ~]$ oc set data secret/htpasswd-secret \ > --from-file htpasswd=/tmp/htpasswd -n openshift-config |
Remove the user resource with the following command:
|
1 2 |
[user@host ~]$ oc delete user manager user.user.openshift.io "manager" deleted |
Identity resources include the name of the identity provider. To delete the identity resource for the manager user, find the resource and then delete it.
|
1 2 3 4 5 |
[user@host ~]$ oc get identities | grep manager my_htpasswd_provider:manager my_htpasswd_provider manager manager ... [user@host ~]$ oc delete identity my_htpasswd_provider:manager identity.user.openshift.io "my_htpasswd_provider:manager" deleted |
Assigning Administrative Privileges
The cluster-wide cluster-admin role grants cluster administration privileges to users and groups. This role enables the user to perform any action on any resources within the cluster. The following example assigns the cluster-admin role to the student user.
|
1 |
[user@host ~]$ oc adm policy add-cluster-role-to-user cluster-admin student |
Excercise 1
In this exercise, you will configure the HTPasswd identity provider and create users for cluster administrators.
Add an entry for two htpasswd users, admin and developer. Assign admin a password of redhat and developer a password of developer.
Create an HTPasswd authentication file named htpasswd in the ~/ auth-provider/ directory. Add the admin user with the password of redhat.
Use the htpasswd command to populate the HTPasswd authentication file with the user names and encrypted passwords. The -B option uses bcrypt encryption. By default, the htpasswd command uses the MD5 hashing algorithm when you do not specify other algorithm.
|
1 2 3 4 |
$ sudo dnf -y install httpd-tools $ mkdir ~/auth-provider $ htpasswd -c -B -b ~/auth-provider/htpasswd admin redhat Adding password for user admin |
Add the developer user with a password of developer to the ~/auth-provider/htpasswd file. The password for the developer user is stored using MD5, because no hashing algorithm was specified when invoking the htpasswd
command.
|
1 2 |
$ htpasswd -b ~/auth-provider/htpasswd developer developer Adding password for user developer |
Review the contents of the ~/auth-provider/htpasswd file and verify that it includes two entries with hashed passwords: one for the admin user and
another for the developer user.
|
1 2 3 |
$ cat ~/auth-provider/htpasswd admin:$2y$05$KsgsueHoqHcdbXCVYCzL9exuqS.aEgzk8oR/8R40oSLK4LlPMM2gm developer:$apr1$2HDtqmJL$qQn5.LrEar4.1BMW7C3U1 |
Log in to the cluster as the kubeadmin user :
|
1 2 3 4 5 |
$ export KUBECONFIG=~/.kube/config $ oc login -u kubeadmin Logged into "https://172.30.9.22:8443" as "kubeadmin" using existing credentials. You don't have any projects. You can try to create a new project, by running oc new-project <projectname> |
Create a secret from the ~/auth-provider/htpasswd file. To
use the HTPasswd identity provider, you must define a secret with a key named htpasswd that contains the HTPasswd user file ~/auth-provider/.
htpasswd
|
1 2 |
$ oc create secret generic localusers --from-file htpasswd=~/auth-provider/htpasswd -n openshift-config secret/localusers created |
Assign the admin user the cluster-admin role :
|
1 2 3 |
$ oc adm policy add-cluster-role-to-user cluster-admin admin Warning: User 'admin' not found cluster role "cluster-admin" added: "admin" |
Export the existing OAuth resource to a file named oauth.yaml in the ~/auth-provider directory:
|
1 |
$ oc get oauth cluster -o yaml > ~/auth-provider/oauth.yaml |
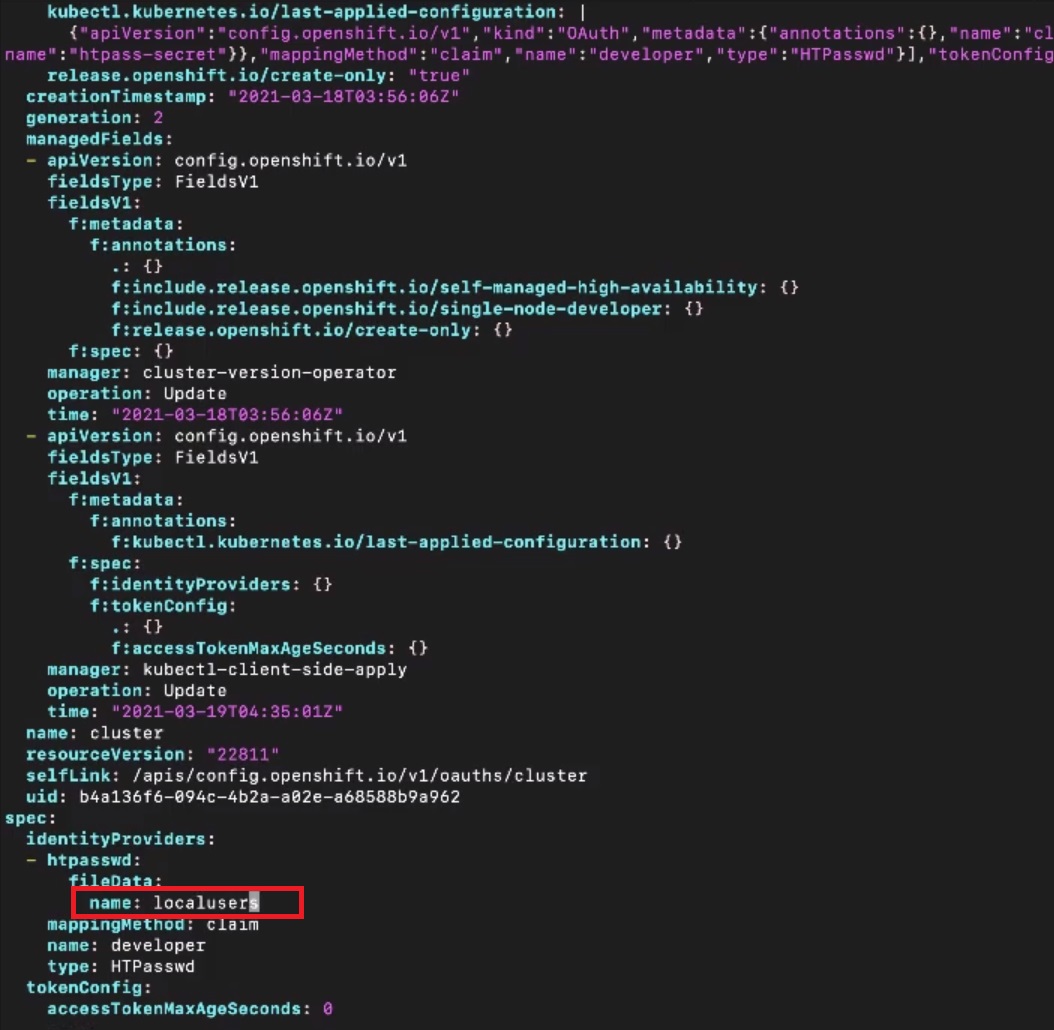
Edit the ~/auth-provider/oauth.yaml file with your preferred text editor. You can choose the names of the identityProviders and fileData structures. For this exercise, use the myusers and localusers values respectively. The completed custom resource should match the following. Note that htpasswd,
mappingMethod, name and type are at the same indentation level.
|
1 2 3 4 5 6 7 8 9 10 11 12 |
apiVersion: config.openshift.io/v1 kind: OAuth metadata: name: cluster spec: identityProviders: - htpasswd: fileData: name: localusers mappingMethod: claim name: myusers type: HTPasswd |
Apply the custom resource defined in the previous step :
|
1 |
$ oc replace -f ~/auth-provider/oauth.yaml |
Pods in the openshift-authentication namespace will redeploy if the oc
replace command succeeds. Provided the previously created secret was created correctly, you can log in using the HTPasswd identity provider.
Log in to the cluster as the admin user to verify the HTPasswd authentication is configured correctly. The authentication operator takes some time to load the configuration changes from the previous step.
|
1 2 |
$ oc login -u admin -p redhat Login successful. |
Use the oc get nodes command to verify that the admin user has the clusteradmin role.
|
1 2 3 4 5 |
$ oc get nodes NAME STATUS ROLES AGE VERSION master01 Ready master,worker 2d v1.23.5+9ce5071 master02 Ready master,worker 2d v1.23.5+9ce5071 master03 Ready master,worker 2d v1.23.5+9ce5071 |
Log in to the cluster as the developer user to verify the HTPasswd authentication is configured correctly
|
1 |
$ oc login -u developer -p developer |
Use the oc get nodes command to verify that the developer and admin users
do not share the same level of access.
|
1 2 3 |
$ oc get nodes No resources found. Error from server (Forbidden): nodes is forbidden: User "developer" cannot list nodes at the cluster scope: no RBAC policy matched |
Log in as the admin user.
|
1 2 |
$ oc login -u admin -p redhat Login successful. |
List the current users
|
1 2 3 4 |
$ oc get identity NAME IDP NAME IDP USER NAME USER NAME USER UID myusers:admin myusers admin admin 31f6ccd2-6c58-47... myusers:developer myusers developer developer d4e77b0d-9740-4f... |
As the admin user, create a new HTPasswd user named manager with a password of redhat.
Extract the file data from the secret to the ~/auth-provider/htpasswd file.
|
1 2 3 |
$ oc extract secret/localusers -n openshift-config \ --to ~/DO280/labs/auth-provider/ --confirm ~/auth-provider/htpasswd |
Add an entry to your ~/auth-provider/htpasswd file for the
additional user manager with a password of redhat.
|
1 2 |
$ htpasswd -b ~/auth-provider/htpasswd manager redhat Adding password for user manage |
Review the contents of your ~/auth-provider/htpasswd file and verify that it includes three entries with hashed passwords: one each for the admin,
developer and manager users
|
1 2 3 4 |
$ cat ~/auth-provider/htpasswd admin:$2y$05$KsgsueHoqHcdbXCVYCzL9exuqS.aEgzk8oR/8R40oSLK4LlPMM2gm developer:$apr1$2HDtqmJL$qQn5.LrEar4.1BMW7C3U10 manager:$apr1$FEEqXKE/$JKEfTjlQ.HltudJZBZ1FY0 |
You must update the secret after adding additional users. Use the oc set datasecret command to update the secret. If you receive a failure, then rerun the command again after a few moments as the oauth operator might still be reloading
|
1 2 3 |
$ oc set data secret/localusers \ --from-file htpasswd=~/auth-provider/htpasswd \ -n openshift-config |
Wait a few moments for the authentication operator to reload, and then log in to the cluster as the manager user.
|
1 2 |
$ oc login -u manager -p redhat Login successful. |
Create a new project named auth-provider, and then verify that the developer user cannot access the project.
As the manager user, create a new auth-provider project.
|
1 2 |
$ oc new-project auth-provider Now using project "auth-provider" |
Log in as the developer user.
|
1 2 |
$ oc login -u developer -p developer Login successful. |
Attempt to delete the auth-provider project.
|
1 2 3 4 |
$ oc delete project auth-provider Error from server (Forbidden): projects.project.openshift.io "auth-provider" is forbidden: User "developer" cannot delete resource "projects" in API group "project.openshift.io" in the namespace "auth-provider" |
Change the password for the manager user.
Log in as the admin user.
|
1 2 |
$ oc login -u admin -p redhat Login successful. |
Extract the file data from the secret to the ~/auth-provider/htpasswd file.
|
1 2 |
$ oc extract secret/localusers -n openshift-config --to ~/auth-provider/ --confirm ~/auth-provider/htpasswd |
Generate a random user password and assign it to the MANAGER_PASSWD variable
|
1 2 3 |
$ MANAGER_PASSWD="$(openssl rand -hex 15)" $ echo $MANAGER_PASSWD 962e0ea57950b2845632f6130ca06 |
Update the manager user to use the password stored in the MANAGER_PASSWD variable.
|
1 2 |
$ htpasswd -b ~/auth-provider/htpasswd manager ${MANAGER_PASSWD} Updating password for user manage |
Update the secret
|
1 2 3 4 |
$ oc set data secret/localusers \ --from-file htpasswd=~/DO280/labs/auth-provider/htpasswd \ -n openshift-config secret/localusers data updated |
Log in as the manager user to verify the updated password.
|
1 2 |
$ oc login -u manager -p ${MANAGER_PASSWD} Login successful. |
8. Remove the manager user.
Log in as the admin user
|
1 2 |
$ oc login -u admin -p redhat Login successful. |
Extract the file data from the secret to the ~/auth-provider/htpasswd file.
|
1 |
$ oc extract secret/localusers -n openshift-config --to ~/auth-provider/ --confirm ~/auth-provider/htpasswd |
Delete the manager user from the ~/auth-provider/htpasswd file.
|
1 2 |
$ htpasswd -D ~/auth-provider/htpasswd manager Deleting password for user manager |
Update the secret.
|
1 2 |
$ oc set data secret/localusers --from-file htpasswd=~/auth-provider/htpasswd -n openshift-config secret/localusers data updated |
Delete the identity resource for the manager user.
|
1 2 |
$ oc delete identity "myusers:manager" identity.user.openshift.io "myusers:manager" deleted |
Delete the user resource for the manager user.
|
1 2 |
$ oc delete user manager user.user.openshift.io manager deleted |
Now, attempts to log in as the manager user fail.
|
1 2 |
$ oc login -u manager -p ${MANAGER_PASSWD} Login failed (401 Unauthorized) |
Verify you have provided correct credentials.
List the current users to verify that the manager user is deleted.
|
1 2 3 4 |
$ oc get users NAME UID FULL NAME IDENTITIES admin 31f6ccd2-6c58-47ee-978d-5e5e3c30d617 myusers:admin developer d4e77b0d-9740-4f05-9af5-ecfc08a85101 myusers:developer |
Display the list of current identities to verify that the manager identity is deleted.
|
1 2 3 4 |
$ oc get identity NAME IDP NAME IDP USER NAME USER NAME myusers:admin myusers admin admin ... myusers:developer myusers developer developer ... |
Extract the secret and verify that only the users admin and developer are
displayed. Using --to-sends the secret to STDOUT rather than saving it to a file.
|
1 2 3 4 |
$ oc extract secret/localusers -n openshift-config --to - # htpasswd admin:$2y$05$TizWp/2ct4Edn08gmeMBIO9IXujpLqkKAJ0Nldxc/V2XYYMBf6WBy developer:$apr1$8Bc6txgb$bwHke4cGRGk9C8tQLg.hi1 |
9. Remove the identity provider and clean up all users.
Log in as the kubeadmin user.
|
1 |
$ oc login -u kubeadmin -p kubepass |
Delete the auth-provider project.
|
1 2 |
$ oc delete project auth-provider project.project.openshift.io "auth-provider" deleted |
Edit the resource in place to remove the identity provider from OAauth:
|
1 |
$ oc edit oauth |
Delete all the lines under spec:, and then append {} after spec:. Leave all the
other information in the file unchanged. Your spec: line should match the following:
|
1 2 |
...output omitted... spec: {} |
Save your changes, and then verify that the oc edit command applied you changes:
|
1 |
oauth.config.openshift.io/cluster edited |
Delete the localusers secret from the openshift-config namespace.
|
1 2 |
$ oc delete secret localusers -n openshift-config secret "localusers" deleted |
Delete all user resources.
|
1 2 3 |
$ oc delete user --all user.user.openshift.io "admin" deleted user.user.openshift.io "developer" deleted |
Delete all identity resources.
|
1 2 3 |
$ oc delete identity --all identity.user.openshift.io "myusers:admin" deleted identity.user.openshift.io "myusers:developer" deleted |
This concludes the guided exercise.
Managing Users
- Managing existing users is a three-step procedure
- Use
oc extractto extract the current username and password from the secret and write it back to htpasswd - Update the current credentials using
htpasswd - Use
oc set data secretto write the updated data to the secret
- Use
- After updating the secret, the OAuth operator redeploys Pods in the openshift-authentication namespace
Changing a User Password
oc extract secret/htpasswd-secret -n openshift-config --to /tmp/ --confirmhtpasswd -B -b /tmp/htpasswd anna newpasswordhtpasswd -B -b /tmp/htpasswd linda secretoc set data secret/htpasswd-secret --from-file htpasswd=/tmp/htpasswd -n openshift-config
|
1 2 3 4 5 6 7 8 9 10 11 12 13 14 15 16 17 18 19 20 21 22 23 24 25 26 27 |
$ oc login -u developer -p developer Login successful. You have access to the following projects and can switch between them with 'oc project <projectname>': * auto debug limits myproject network-security nodesel quota-test Using project "auto". $ oc extract secret/htpasswd-secret -n openshift-config --to /tmp/ --confirm Error from server (Forbidden): secrets "htpasswd-secret" is forbidden: User "developer" cannot get secrets in the namespace "openshift-config": no RBAC policy matched $ oc extract secret/htpasswd-secret --to /tmp/ --confirm $ htpasswd -B -b /tmp/htpasswd anna password Updating password for user anna $ htpasswd -B -b /tmp/htpasswd linda password Updating password for user linda $ htpasswd -B -b /tmp/htpasswd bob password Adding password for user bob $ oc set data secret/htpasswd-secret --from-file htpasswd=/tmp/htpasswd -n openshift-config |
Deleting Users
- The procedure to delete users is comparable to the procedure to update users
- Extract the current secret data to a temporary file
- Use
htpasswd -Dto delete the user - Use
oc set data secretto update the secret
Working with Groups
- Groups are used to assign additional privileges to people users
- Use
oc adm groupsto work with Groupsoc adm groups new developersoc adm groups add-users developers annaoc get groupswill show currently existing groups
- After creating groups, use
oc policyto grant privileges (further explained in Lesson 6)oc policy add-role-to-group edit developers
|
1 2 3 4 5 6 7 8 9 10 11 12 13 14 15 16 17 18 19 20 21 22 23 24 25 26 27 28 29 30 31 32 33 34 35 36 37 38 39 40 41 42 43 44 45 46 47 48 49 50 51 52 53 54 55 |
$ oc login -u system:admin $ oc adm groups -h Manage groups in your cluster Groups are sets of users that can be used when describing policy. Usage: oc adm groups [flags] Available Commands: add-users Add users to a group new Create a new group prune Remove old OpenShift groups referencing missing records on an external provider remove-users Remove users from a group sync Sync OpenShift groups with records from an external provider. Use "oc adm <command> --help" for more information about a given command. Use "oc adm options" for a list of global command-line options (applies to all commands). $ oc adm groups new developers group.user.openshift.io/developers created $ oc adm groups add-users developers anna group "developers" added: "anna" $ oc get groups NAME USERS developers anna $ oc policy -h Manage authorization policy Usage: oc policy [flags] Available Commands: add-role-to-group Add a role to groups for the current project add-role-to-user Add a role to users or serviceaccounts for the current project can-i Check whether an action is allowed remove-group Remove group from the current project remove-role-from-group Remove a role from groups for the current project remove-role-from-user Remove a role from users for the current project remove-user Remove user from the current project scc-review Checks which ServiceAccount can create a Pod scc-subject-review Check whether a user or a ServiceAccount can create a Pod. who-can List who can perform the specified action on a resource Use "oc <command> --help" for more information about a given command. Use "oc options" for a list of global command-line options (applies to all commands). $ oc policy add-role-to-group edit developers role "edit" added: "developers" |
Assign Administrative Privileges
- To assign Administrative privileges, the user must be added to the cluster-admin role:
oc adm policy add-cluster-role-to-user cluster-admin anna
- Tip: Use Tab completion to complete the
oc adm policycommand
|
1 2 3 4 5 6 7 8 9 10 11 12 13 14 15 16 17 18 19 20 21 22 23 24 25 26 27 28 29 30 31 32 33 34 35 36 37 38 39 40 41 42 43 44 45 46 47 48 49 50 51 52 53 54 |
$ oc whoami system:admin $ oc adm policy -h Manage policy on the cluster These commands allow you to assign and manage the roles and policies that apply to users. The reconcile commands allow you to reset and upgrade your system policies to the latest default policies. To see more information on roles and policies, use the 'get' and 'describe' commands on the following resources: 'clusterroles', 'clusterpolicy', 'clusterrolebindings', 'roles', 'policy', 'rolebindings', and 'scc'. Usage: oc adm policy [flags] Discover: who-can List who can perform the specified action on a resource scc-subject-review Check whether a user or a ServiceAccount can create a Pod. scc-review Checks which ServiceAccount can create a Pod Manage project membership: remove-user Remove user from the current project remove-group Remove group from the current project Assign roles to users and groups: add-role-to-user Add a role to users or serviceaccounts for the current project add-role-to-group Add a role to groups for the current project remove-role-from-user Remove a role from users for the current project remove-role-from-group Remove a role from groups for the current project Assign cluster roles to users and groups: add-cluster-role-to-user Add a role to users for all projects in the cluster add-cluster-role-to-group Add a role to groups for all projects in the cluster remove-cluster-role-from-user Remove a role from users for all projects in the cluster remove-cluster-role-from-group Remove a role from groups for all projects in the cluster Manage policy on pods and containers: add-scc-to-user Add security context constraint to users or a service account add-scc-to-group Add security context constraint to groups remove-scc-from-user Remove user from scc remove-scc-from-group Remove group from scc Upgrade and repair system policy: reconcile-cluster-roles Update cluster roles to match the recommended bootstrap policy reconcile-cluster-role-bindings Update cluster role bindings to match the recommended bootstrap policy reconcile-sccs Replace cluster SCCs to match the recommended bootstrap policy Use "oc adm policy <command> --help" for more information about a given command. Use "oc adm options" for a list of global command-line options (applies to all commands). $ oc adm policy add-cluster-role-to-user cluster-admin anna cluster role "cluster-admin" added: "anna" |
Lab: Managing Users
- Use the
HTPasswdprovider to create userslisaandlori. Both have the passwords set to “password“. User lisa should be granted administrator privileges and user lori should not. - After creating the users, log in as either of these users to verify that the administrator command
oc get nodesworks - After trying this, use
oc get usersto verify the existence of both users
|
1 2 3 4 5 6 7 8 9 10 11 12 13 14 15 16 17 18 19 20 21 22 23 24 25 26 27 28 29 30 31 32 33 34 35 36 37 38 39 40 41 42 43 44 45 |
$ oc whoami system:admin $ htpasswd -c -B -b htpasswd lisa password Adding password for user lisa $ htpasswd -c -B -b htpasswd lori password Adding password for user lori $ htpasswd -c -B -b htpasswd admin password Adding password for user admin $ oc create secret generic localusers --from-file htpasswd -n openshift-config Error from server (NotFound): namespaces "openshift-config" not found $ oc create secret generic localusers --from-file htpasswd secret/localusers created $ oc get users NAME UID FULL NAME IDENTITIES anna 9baafe09-32c1-11ee-9acf-8e5760356a66 anypassword:anna developer f4f2ad1c-28c1-11ee-be7a-8e5760356a66 anypassword:developer kubadmin f64059d1-2d63-11ee-9acf-8e5760356a66 anypassword:kubadmin kubeadmin c30e9822-2976-11ee-9acf-8e5760356a66 anypassword:kubeadmin linda ad85538a-32c1-11ee-9acf-8e5760356a66 anypassword:linda system e0e53c6f-2ca5-11ee-9acf-8e5760356a66 anypassword:system [root@okd ex280]# [root@okd ex280]# oc adm policy add-cluster-role-to-user cluster-admin lisa Warning: User 'lisa' not found cluster role "cluster-admin" added: "lisa" $ oc adm policy add-cluster-role-to-user cluster-admin admin Warning: User 'admin' not found cluster role "cluster-admin" added: "admin" $ oc get oauth cluster error: the server doesn't have a resource type "oauth" $ oc get oauth cluster error: the server doesn't have a resource type "oauth" $ oc get oauth cluster -o yaml > oauth.yaml error: the server doesn't have a resource type "oauth" $ vim oauth.yaml |
Edit the oauth.yaml file:
|
1 2 3 4 5 6 7 8 9 10 11 12 13 14 15 16 17 18 19 20 21 22 23 24 25 26 27 28 29 30 31 32 33 34 35 36 37 38 39 40 41 42 43 44 45 46 47 48 49 50 51 52 53 54 55 56 57 58 59 60 61 62 63 64 65 66 67 68 69 70 71 72 73 74 75 76 77 78 79 80 81 82 83 84 85 86 87 88 89 90 91 92 93 94 95 96 97 98 99 100 101 102 103 104 105 106 107 108 109 110 111 112 113 |
$ oc replace -f oauth.yaml $ oc get pods NAME READY STATUS RESTARTS AGE auto-1-build 0/1 Error 0 6d $ oc get pods -n openshift-authentication No resources found. $ oc login -u lisa -password Login successful. You have access to the following projects and can switch between them with 'oc project <projectname>': * auto openshift openshift-apiserver openshift-controller-manager openshift-core-operators openshift-infra openshift-node openshift-service-cert-signer openshift-web-console quota-test source-project target-project template-project test-project Using project "auto". $ oc get nodes NAME STATUS ROLES AGE VERSION localhost Ready <none> 12d v1.11.0+d4cacc0 [root@okd ex280]# oc login -u admin -password Login successful. You have access to the following projects and can switch between them with 'oc project <projectname>': * auto openshift openshift-apiserver openshift-controller-manager openshift-core-operators openshift-infra openshift-node openshift-service-cert-signer openshift-web-console quota-test source-project target-project template-project test-project Using project "auto". [root@okd ex280]# oc login -u lori -password Login successful. You don't have any projects. You can try to create a new project, by running oc new-project <projectname> $ oc get users No resources found. Error from server (Forbidden): users.user.openshift.io is forbidden: User "lori" cannot list users.user.openshift.io at the cluster scope: no RBAC policy matched $ oc login -u lisa -password Login successful. You have access to the following projects and can switch between them with 'oc project <projectname>': auto debug * default kube-dns kube-proxy kube-public kube-system limit-project limits love myproject myvol network-security nodesel openshift openshift-apiserver openshift-controller-manager openshift-core-operators openshift-infra openshift-node openshift-service-cert-signer openshift-web-console quota-test source-project target-project template-project test-project Using project "default". $ oc get users NAME UID FULL NAME IDENTITIES admin fe5d105d-32d6-11ee-9acf-8e5760356a66 anypassword:admin anna 9baafe09-32c1-11ee-9acf-8e5760356a66 anypassword:anna developer f4f2ad1c-28c1-11ee-be7a-8e5760356a66 anypassword:developer kubadmin f64059d1-2d63-11ee-9acf-8e5760356a66 anypassword:kubadmin kubeadmin c30e9822-2976-11ee-9acf-8e5760356a66 anypassword:kubeadmin linda ad85538a-32c1-11ee-9acf-8e5760356a66 anypassword:linda lisa f4341ede-32d6-11ee-9acf-8e5760356a66 anypassword:lisa lori 02cb3f54-32d7-11ee-9acf-8e5760356a66 anypassword:lori system e0e53c6f-2ca5-11ee-9acf-8e5760356a66 anypassword:system |
Lori is oridnary user so she can not get users, lori and admin can do that.
Role-based Access Control (RBAC)
Role-based access control (RBAC) is a technique for managing access to resources in a computer system. RBAC determines if a user can perform certain actions within the cluster or project. There are two types of roles that can be used depending on the user’s level of responsibility: cluster and local.
Understanding RBAC
- The purpose of RBAC is to connect users to specific roles
- Roles have either a project or a cluster scope
- Different types of users are available
- Users are created as a specific user type, and are granted access to cluster resources using role bindings
The authorization process is managed by rules, roles, and bindings.
- Rule – Allowed actions for objects or groups of objects.
- Role – Sets of rules. Users and groups can be associated with multiple roles.
- Binding – Assignment of users or groups to a role.Red Hat OpenShift Container Platform (RHOCP) defines two groups of roles and bindings depending on the user’s scope and responsibility: cluster roles and local roles.
- Cluster Role – Users or groups with this role level can manage the OpenShift cluster.
- Local Role – Users or groups with this role level can only manage elements at a
project level.
Understanding Roles
- A role is an API resource that gives specific users access to OpenShift resources, based on verbs
- Verbs are used as permissions, and include
get, list, watch, create, update, patch, delete
- Verbs are used as permissions, and include
- Cluster Roles are created when OpenShift is installed
- Local Roles provide access to project-based resources
- Use
oc describe clusterrole.rbacfor an overview of currently existing cluster roles
Understanding Role Bindings
- A Role Binding is used to connect a cluster role to a user or group
- Use
oc describe clusterrolebinding.rbacfor an overview of bindings between users/groups and roles - Use
oc describe rolebindings.rbacto see all roles with a non-cluster scope - Use
oc describe rolebindings.rbac -n myprojectto see local roles assigned to a specific project
Understanding Default Roles
- Some default roles are provided to be applied locally or to the entire cluster
- admin: gives full control to all project resources
- basic-user: gives read access to projects
- cluster-admin: allows a user to perform any action in the cluster
- cluster-status: allows a user to request status information
- edit: allows creating and modifying common application resources, but gives no access to permissions, quotas, or limit ranges
- self-provisioner: this cluster role allows users to create new projects
- view: allows users to view but not modify project resources
- The admin role gives users full project permissions
- The edit role corresponds to the typical developer user
The admin role gives a user access to project resources such as quotas and limit ranges, and also the ability to create new applications. The edit role gives a user sufficient access to act as a developer inside the project, but working under the constraints configured by a project administrator.
Understanding User Types
- Regular users represent a user object that is granted access to the cluster platform
- System users are created automatically to allow system components to access specific resources
- system:admin has full admin access
- system:openshift-registry is used for registry access
- system:node:serverl.example.com is used for node access
- Service accounts are special system accounts used to give extra privileges to pods or deployments
- deployer: is used to create deployments
- builder: is used to create build configs in S2I
Managing RBAC
- Cluster administrators can use
oc adm policyto manage cluster and namespace rolesoc adm policy add-cluster-role-to-user rolenname usernameoc adm policy remove-cluster-role-from-user rolename username
- To figure out who can do what, use
oc adm policy who-can delete user
Managing RBAC Using the CLI
- Cluster administrators can use the
oc admpolicy command to both add and remove cluster roles and namespace roles.
To add a cluster role to a user, use the add-cluster-role-to-user subcommand:
|
1 |
$ oc adm policy add-cluster-role-to-user cluster-role username |
For example, to change a regular user to a cluster administrator, use the following command:
|
1 |
$ oc adm policy add-cluster-role-to-user cluster-admin username |
To remove a cluster role from a user, use the remove-cluster-role-from-user
subcommand:
|
1 |
$ oc adm policy remove-cluster-role-from-user cluster-role username |
For example, to change a cluster administrator to a regular user, use the following command:
|
1 |
$ oc adm policy remove-cluster-role-from-user cluster-admin username |
Rules are defined by an action and a resource. For example, the create user rule is part of the cluster-admin role. You can use the oc adm policy who-can command to determine if a user can execute an action on a resource. For example:
|
1 |
$ oc adm policy who-can delete user |
- Project administrators can use the
oc policycommand to add and remove namespace roles. Add a specified role to a user with the add-role-to-user subcommand. For example:
1[user@host ~]$ oc policy add-role-to-user role-name username -n project
For example, to add the user dev to the role basic-user in the wordpress project:
|
1 |
[user@host ~]$ oc policy add-role-to-user basic-user dev -n wordpress |
Exercise 1
|
1 2 3 4 5 6 7 8 9 10 11 12 13 14 15 16 17 18 19 20 21 22 23 24 25 26 27 28 29 30 31 32 33 34 35 36 37 38 39 40 41 42 43 44 45 46 47 48 49 50 51 52 53 54 55 56 57 58 59 60 61 62 63 64 65 66 67 68 69 70 71 72 73 74 75 76 77 78 79 80 81 82 83 84 85 86 87 88 89 90 91 92 93 94 95 96 97 98 99 100 101 102 103 104 105 106 107 108 109 110 111 112 113 114 115 116 117 118 119 120 121 122 123 124 125 126 127 128 129 130 131 132 133 134 135 136 137 138 139 140 141 142 143 144 145 146 147 148 149 150 151 152 153 154 155 156 157 158 159 160 161 162 163 164 165 166 167 168 169 170 171 172 173 174 175 176 177 178 179 180 181 182 183 184 185 186 187 188 189 190 191 192 193 194 195 196 197 198 199 200 201 202 203 204 |
$ oc explain oauth.spec error: You must be logged in to the server (the server has asked for the client to provide credentials) $ oc login -u developer -p developer Login successful. You have access to the following projects and can switch between them with 'oc project <projectname>': * auto debug Using project "auto". $ oc explain oauth.spec the server doesn't have a resource type "oauth" $ oc explain oauth the server doesn't have a resource type "oauth" $ oc get oauth cluster error: the server doesn't have a resource type "oauth" $ httpasswd -c -B -b Using username "root". root@172.30.9.22's password: Send automatic password Last login: Thu Aug 3 18:26:07 2023 from 10.8.152.84 $ oc whoami developer $ htpasswd -c -B -b /tmp/htpasswd admin password Adding password for user admin $ htpasswd -b /tmp/htpasswd anna password Adding password for user anna $ htpasswd -b /tmp/htpasswd linda password Adding password for user linda $ cat /tmp/htpasswd admin:$2y$05$xp7L9AwDnI9Mil28zfSeIO71.Q3M/YcPRtYkxx8VxiixcIyV8ElFq anna:$apr1$Yh2pvQKM$OZpqHTmjaf.UAFngMy5891 linda:$apr1$E3tvZMiK$DCe0VPfNUIuHgu5e58BOo/ $ oc create secret generic htpasswd-secret secret/htpasswd-secret created $ oc create secret generic htpasswd-secret --from-file htpasswd=/tmp/htpasswd Error from server (AlreadyExists): secrets "htpasswd-secret" already exists $ oc create secret generic htpasswd-secret --from-file htpasswd=/tmp/htpasswd -n openshift-config Error from server (Forbidden): secrets is forbidden: User "developer" cannot create secrets in the namespace "openshift-config": no RBAC policy mat ched $ oc login -u system:admin Logged into "https://172.30.9.22:8443" as "system:admin" using existing credentials. You have access to the following projects and can switch between them with 'oc project <projectname>': * auto openshift openshift-apiserver openshift-controller-manager openshift-core-operators openshift-infra openshift-node openshift-service-cert-signer openshift-web-console quota-test source-project target-project template-project test-project Using project "auto". $ oc create secret generic htpasswd-secret --from-file htpasswd=/tmp/htpasswd -n openshift-config Error from server (NotFound): namespaces "openshift-config" not found $ oc describe secret htpasswd-secret -n openshift-config Error from server (NotFound): namespaces "openshift-config" not found $ oc describe secret htpasswd-secret Name: htpasswd-secret Namespace: auto Labels: <none> Annotations: <none> Type: Opaque Data ==== $ oc adm policy add-cluster-role-to-user cluster-admin anna Warning: User 'anna' not found cluster role "cluster-admin" added: "anna" $ oc get oauth error: the server doesn't have a resource type "oauth" $ cd ~/ex280 $ oc get oauth -o yaml > oauth.yaml error: the server doesn't have a resource type "oauth" $ vim oauth.yaml $ oc replace -f oauth.yaml $ oc get pods NAME READY STATUS RESTARTS AGE auto-1-build 0/1 Error 0 6d [root@okd ex280]# oc get pods -n openshift-authentication No resources found. $ oc get users NAME UID FULL NAME IDENTITIES developer f4f2ad1c-28c1-11ee-be7a-8e5760356a66 anypassword:developer kubadmin f64059d1-2d63-11ee-9acf-8e5760356a66 anypassword:kubadmin kubeadmin c30e9822-2976-11ee-9acf-8e5760356a66 anypassword:kubeadmin system e0e53c6f-2ca5-11ee-9acf-8e5760356a66 anypassword:system $ oc login -u anna -p password Login successful. You have access to the following projects and can switch between them with 'oc project <projectname>': * auto openshift openshift-apiserver openshift-controller-manager openshift-core-operators openshift-infra openshift-node openshift-service-cert-signer openshift-web-console Using project "auto". $ oc get users NAME UID FULL NAME IDENTITIES anna 9baafe09-32c1-11ee-9acf-8e5760356a66 anypassword:anna developer f4f2ad1c-28c1-11ee-be7a-8e5760356a66 anypassword:developer kubadmin f64059d1-2d63-11ee-9acf-8e5760356a66 anypassword:kubadmin kubeadmin c30e9822-2976-11ee-9acf-8e5760356a66 anypassword:kubeadmin system e0e53c6f-2ca5-11ee-9acf-8e5760356a66 anypassword:system $ oc get nodes NAME STATUS ROLES AGE VERSION localhost Ready <none> 12d v1.11.0+d4cacc0 $ oc login -u linda -p password Login successful. You don't have any projects. You can try to create a new project, by running oc new-project <projectname> $ oc get nodes No resources found. Error from server (Forbidden): nodes is forbidden: User "linda" cannot list nodes at the cluster scope: no RBAC policy matched $ oc login -u anna -p password Login successful. You have access to the following projects and can switch between them with 'oc project <projectname>': auto debug * default openshift openshift-apiserver openshift-controller-manager openshift-core-operators openshift-infra openshift-node openshift-service-cert-signer openshift-web-console quota-test source-project target-project template-project test-project Using project "default". $ oc get users NAME UID FULL NAME IDENTITIES anna 9baafe09-32c1-11ee-9acf-8e5760356a66 anypassword:anna developer f4f2ad1c-28c1-11ee-be7a-8e5760356a66 anypassword:developer kubadmin f64059d1-2d63-11ee-9acf-8e5760356a66 anypassword:kubadmin kubeadmin c30e9822-2976-11ee-9acf-8e5760356a66 anypassword:kubeadmin linda ad85538a-32c1-11ee-9acf-8e5760356a66 anypassword:linda system e0e53c6f-2ca5-11ee-9acf-8e5760356a66 anypassword:system $ oc get identity NAME IDP NAME IDP USER NAME USER NAME USER UID anypassword:anna anypassword anna anna 9baafe09-32c1-11ee-9acf-8e5760356a66 anypassword:developer anypassword developer developer f4f2ad1c-28c1-11ee-be7a-8e5760356a66 anypassword:kubadmin anypassword kubadmin kubadmin f64059d1-2d63-11ee-9acf-8e5760356a66 anypassword:kubeadmin anypassword kubeadmin kubeadmin c30e9822-2976-11ee-9acf-8e5760356a66 anypassword:linda anypassword linda linda ad85538a-32c1-11ee-9acf-8e5760356a66 anypassword:system anypassword system system e0e53c6f-2ca5-11ee-9acf-8e5760356a66 |
Excercise 2
List all cluster role bindings that reference the self-provisioner cluster role.
|
1 2 3 |
$ oc get clusterrolebinding | grep -E 'NAME|self-provisioner' NAME AGE self-provisioners 4d |
Confirm that the self-provisioners cluster role binding that you found
in the previous step assigns the self-provisioner cluster role to the
system:authenticated:oauth group.
|
1 2 3 4 5 6 7 8 9 10 11 12 |
$ oc describe clusterrolebindings self-provisioners Name: self-provisioners Labels: <none> Annotations: rbac.authorization.kubernetes.io/autoupdate=true Role: Kind: ClusterRole Name: self-provisioner Subjects: Kind Name Namespace ---- ---- --------- Group <strong>system:authenticated:oauth </strong> |
Remove the self-provisioner cluster role from the system:authenticated:oauth virtual group, which deletes the selfprovisioners role binding.
|
1 2 3 |
$oc adm policy remove-cluster-role-from-group \ self-provisioner system:authenticated:oauth Warning: Your changes may get lost whenever a master is restarted, unless you prevent reconciliation of this rolebinding using the following command: oc annotate clusterrolebinding.rbac self-provisioners 'rbac.authorization.kubernetes.io/autoupdate=false' --overwritecluster role "self-provisioner" removed: "system:authenticated:oauth" |
You can safely ignore the warning about your changes being lost. Verify that the role has been removed from the group. The cluster role binding selfprovisioners should not exist.
|
1 2 |
$ oc describe clusterrolebindings self-provisioners Error from server (NotFound): clusterrolebindings.rbac.authorization.k8s.io "self-provisioners" not found |
Determine if any other cluster role bindings reference the self-provisioner
cluster role:
|
1 2 |
$ oc get clusterrolebinding -o wide | grep -E 'NAME|self-provisioner' NAME AGE ROLE USERS GROUPS SERVICEACCOUNTS |
Log in as the leader user with a password of redhat
|
1 2 3 |
$ oc login -u leader -p redhat Login successful. You don't have any projects. Contact your system administrator to request a project. |
Try to create a project, the operation should fail.
|
1 2 |
$ oc new-project test Error from server (Forbidden): You may not request a new project via this API. |
Log in as the admin user.
|
1 2 |
$ oc login -u admin -p redhat Login successful. |
Create the auth-rbac project.
|
1 2 |
$ oc new-project auth-rbac Now using project "auth-rbac" on server "https://172.30.9.22:8443". |
Grant project administration privileges to the leader user on the auth-rbac
project.
|
1 2 |
$ oc policy add-role-to-user admin leader role "admin" added: "leader" |
Create a group called dev-group.
|
1 2 |
$ oc adm groups new dev-group group.user.openshift.io/dev-group created |
Add the developer user to dev-group.
|
1 2 |
$ oc adm groups add-users dev-group developer group "dev-group" added: "developer" |
Create a second group called qa-group.
|
1 2 |
$ oc adm groups new qa-group group.user.openshift.io/qa-group created |
Add the qa-engineer user to qa-group.
|
1 2 |
oc adm groups add-users qa-group qa-engineer group "qa-group" added: "qa-engineer" |
Review all existing OpenShift groups to verify that they have the correct members.
|
1 2 3 4 |
$ oc get groups NAME USERS dev-group developer qa-group qa-engineer |
Log in as the leader user
|
1 2 |
$ oc login -u leader -p redhat Login successful. |
Add write privileges to dev-group on the auth-rbac project.
|
1 2 |
$ oc policy add-role-to-group edit dev-group role "edit" added: "dev-group" |
Add read privileges to qa-group on the auth-rbac project.
|
1 2 |
$ oc policy add-role-to-group view qa-group role "view" added: "qa-group" |
Review all role bindings on the auth-rbac project to verify that they assign roles to the correct groups and users. The following output omits default role bindings assigned by OpenShift to service accounts.
|
1 2 3 4 5 6 7 8 9 |
$ oc get rolebindings -o wide NAME AGE ROLE USERS GROUPS SERVICEACCOUNTS admin 10m ClusterRole/admin admin admin-0 9m ClusterRole/admin leader edit 2m ClusterRole/edit dev-group system:deployers 10m ClusterRole/system:deployer auth-rbac/deployer system:image-builders 10m ClusterRole/system:image-builder auth-rbac/builder system:image-pullers 10m ClusterRole/system:image-puller system:serviceaccounts:auth-rbac view 1m ClusterRole/view qa-group |
Log in as the developer user
|
1 2 |
$ oc login -u developer -p developer Login successful. |
Deploy an Apache HTTP Server using the standard image stream from OpenShift.
|
1 2 3 4 5 6 7 8 9 10 11 12 13 14 15 16 17 |
$ oc new-app --name httpd httpd --> Found Docker image d140b77 (7 days old) from Docker Hub for "httpd" * An image stream tag will be created as "httpd:latest" that will track this image * This image will be deployed in deployment config "httpd" * Port 80/tcp will be load balanced by service "httpd" * Other containers can access this service through the hostname "httpd" * WARNING: Image "httpd" runs as the 'root' user which may not be permitted by your cluster administrator --> Creating resources ... imagestream.image.openshift.io "httpd" created deploymentconfig.apps.openshift.io "httpd" created service "httpd" created --> Success Application is not exposed. You can expose services to the outside world by executing one or more of the commands below: 'oc expose svc/httpd' Run 'oc status' to view your app. |
Try to grant write privileges to the qa-engineer user, the operation should fail
|
1 2 |
$ oc policy add-role-to-user edit qa-engineer Error from server (Forbidden): rolebindings.rbac.authorization.k8s.io is forbidden: User "developer" cannot list rolebindings.rbac.authorization.k8s.io in the namespace "auth-rbac": no RBAC policy matched |
Verify that the qa-engineer user only has read privileges on the httpd application.
|
1 2 3 4 |
oc login -u qa-engineer -p redhat Login successful. You have one project on this server: "auth-rbac" Using project "auth-rbac". |
Attempt to scale the httpd application, the operation should fail.
|
1 2 |
$ oc scale deployment httpd --replicas 3 Error from server (NotFound): deployments.extensions "httpd" not found |
Log in as the admin user
|
1 2 |
$ oc login -u admin -p redhat Login successful. |
Restore project creation privileges for all users by recreating the selfprovisioners cluster role binding created by the OpenShift installer
|
1 2 3 4 5 |
oc adm policy add-cluster-role-to-group \ > --rolebinding-name self-provisioners \ > self-provisioner system:authenticated:oauth Warning: Group 'system:authenticated:oauth' not found cluster role "self-provisioner" added: "system:authenticated:oauth" |
You can safely ignore the warning that the group was not found.
Excercise.
We have ~/auth-review/tmp_users file:
|
1 2 3 4 |
$ cat tmp_user tester:$apr1$0eqhKgbU$DWd0CB4IumhasaRuEr6hp0 leader:$apr1$.EB5IXlu$FDV.Av16njlOCMzgolScr/ analyst:$apr1$0eqhKgbU$DWd0CB4IumhasaRuEr6hp0 |
1. Update the existing ~/auth-review/tmp_users HTPasswd authentication
file to remove the analyst user. Ensure that the tester and leader users in the file use a password of Labreview. Add two new entries to the file for the users admin and developer. Use Labreview as the password for each new user.
2. Log in to your OpenShift cluster as the kubeadmin user using the
password defined in the /root/.kube/config file as the password. Configure your cluster to use the HTPasswd identity provider using the user names and passwords in the ~/auth-review/tmp_users file.
3. Make the admin user a cluster administrator. Log in as both admin and as developer to verify HTPasswd user configuration and cluster privileges.
4. As the admin user, remove the ability to create projects cluster wide.
5. Create a group named managers, and add the leader user to the group. Grant project creation privileges to the managers group. As the leader user, create the auth-review project.
6. Create a group named developers and grant edit privileges on the auth-review project. Add the developer user to the group.
7. Create a group named qa and grant view privileges on the auth-review project. Add the tester user to the group.
1. Remove the analyst user from the ~/auth-review/tmp_users
HTPasswd authentication file.
|
1 2 |
$ htpasswd -D ~/auth-review/tmp_users analyst Deleting password for user analyst |
Update the entries for the tester and leader users so that they use a password of Labreview. Add entries for the admin and developer users using a password of Labreview.
|
1 2 3 4 5 6 7 8 |
$ for NAME in tester leader admin developer \ do \ htpasswd -b ~/auth-review/tmp_users ${NAME} 'Labreview' \ done Updating password for user tester Updating password for user leader Adding password for user admin Adding password for user developer |
Review the contents of the ~/auth-review/tmp_users file. It does not contain a line for the analyst user. It includes two new entries with hashed
passwords for the admin and developer users.
|
1 2 3 4 5 6 |
$ cat ~/auth-review/tmp_users tester:$apr1$L4omTyg/$71Lvf/iFItnJa8T1ggNMq1 leader:$apr1$nhs.mUqE$3r5MrE6fiNQ.o7d5SxHDw/ <strong>admin:$apr1$evJCAbt/$jJ5TR51yw0P4sbWFGcu.d/ developer:$apr1$w2oO1UjM$frPgBp54mdnVpp3S1Q1Se1 </strong> |
2. Log in to the cluster as the kubeadmin user.
|
1 |
$ oc login -u kubeadmin -p kubepass |
Create a secret named auth-review using the ~/auth-review/tmp_users file
|
1 2 3 4 |
$ oc create secret generic auth-review \ --from-file htpasswd=~/auth-review/tmp_users \ -n openshift-config secret/auth-review created |
Export the existing OAuth resource to ~/auth-review/oauth.yaml.
|
1 |
$ oc get oauth cluster -o yaml > ~/auth-review/oauth.yaml |
Edit the ~/auth-review/oauth.yaml file to replace the spec: {} line with the following bold lines. Note that htpasswd, mappingMethod, name and type are at the same indentation level.
|
1 2 3 4 5 6 7 8 9 10 11 12 13 |
# cat oauth.yaml apiVersion: config.openshift.io/v1 kind: OAuth metadata: name: cluster spec: identityProviders: - htpasswd: fileData: name: auth-review mappingMethod: claim name: htpasswd type: HTPasswd |
Apply the customized resource defined in the previous step
|
1 2 |
$ oc replace -f ~/auth-review/oauth.yaml oauth.config.openshift.io/cluster replaced |
A successful update to the oauth/cluster resource recreates the oauthopenshift pods in the openshift-authentication namespace.
|
1 |
$ watch oc get pods -n openshift-authentication |
Wait until the new oauth-openshift pods are ready and running and the previous pods have terminated.
|
1 2 3 4 5 |
Every 2.0s: oc get pods -n openshift-authentication ... NAME READY STATUS RESTARTS AGE oauth-openshift-6755d8795-h8bgv 1/1 Running 0 34s oauth-openshift-6755d8795-rk4m6 1/1 Running 0 38s oauth-openshift-6755d8795-2859w 1/1 Running 0 53s |
Press Ctrl+C to exit the watch command.
3. Assign the admin user the cluster-admin role
|
1 2 |
$ oc adm policy add-cluster-role-to-user cluster-admin admin cluster role "cluster-admin" added: "admin" |
Log in to the cluster as the admin user to verify that HTPasswd authentication was configured correctly.
|
1 2 |
$ oc login -u admin -p 'Labreview' Login successful. |
Use oc get nodes command to verify the admin user has the cluster-admin role. The names of the nodes from your cluster might be different.
|
1 2 3 |
$ oc get nodes NAME STATUS ROLES AGE VERSION localhost Ready <none> 4d v1.11.0+d4cacc0 |
Log in to the cluster as the developer user to verify the HTPasswd authentication is configured correctly.
|
1 2 |
$ oc login -u developer -p 'Labreview' Login successful. |
Use the oc get nodes command to verify that the developer user does not have cluster administration privileges.
|
1 2 3 |
$ oc get nodes No resources found. Error from server (Forbidden): nodes is forbidden: User "developer" cannot list nodes at the cluster scope: no RBAC policy matched |
4. Log in to the cluster as the admin user.
|
1 2 |
$ oc login -u admin -p 'Labreview' Login successful. |
Remove the self-provisioner cluster role from the system:authenticated:oauth virtual group.
|
1 2 3 4 |
$ oc adm policy remove-cluster-role-from-group \ self-provisioner system:authenticated:oauth cluster role "self-provisioner" removed: "system:authenticated:oauth" |
5. Create a group named managers.
|
1 2 |
$ oc adm groups new managers group.user.openshift.io/managers created |
Add the leader user to the managers group.
|
1 2 |
$ oc adm groups add-users managers leader group "managers" added: "leader" |
Assign the self-provisioner cluster role to the managers group
|
1 2 |
$ oc adm policy add-cluster-role-to-group self-provisioner managers cluster role "self-provisioner" added: "managers" |
As the leader user, create the auth-review project.
|
1 2 |
$ oc login -u leader -p 'Labreview' Login successful. |
The user who creates a project is automatically assigned the admin role on the project.
|
1 2 3 4 |
$ oc new-project auth-review Now using project "auth-review" on server "https://172.30.9.22:8443". You can add applications to this project with the 'new-app' command. For example, try: oc new-app centos/ruby-25-centos7~https://github.com/sclorg/ruby-ex.git |
6. Log in to the cluster as the admin user.
|
1 2 |
$ oc login -u admin -p 'Labreview' Login successful. |
Create a group named developers.
|
1 2 |
$ oc adm groups new developers group.user.openshift.io/developers created |
Add the developer user to the developers group
|
1 2 |
$ oc adm groups add-users developers developer group "developers" added: "developer" |
Grant edit privileges to the developers group on the auth-review project
|
1 2 |
$ oc policy add-role-to-group edit developers role "edit" added: "developers" |
7. Create a group named qa.
|
1 2 |
$ oc adm groups new qa group.user.openshift.io/qa created |
Add the tester user to the qa group.
|
1 2 |
$ oc adm groups add-users qa tester group.user.openshift.io/qa added: "tester" |
Grant view privileges to the qa group on the auth-review project.
|
1 2 |
$ oc policy add-role-to-group view qa clusterrole.rbac.authorization.k8s.io/view added: "qa" |
Excercise
|
1 2 3 4 5 6 7 8 9 10 11 12 13 14 15 16 17 18 19 20 21 22 23 24 25 26 27 28 29 30 31 32 33 34 35 36 37 38 39 40 41 42 43 44 45 46 47 48 49 50 51 52 53 54 55 56 57 58 59 60 61 62 63 64 65 66 67 68 69 70 71 72 73 74 75 76 77 78 79 80 81 82 83 84 85 86 87 88 89 90 91 92 93 94 95 96 97 98 99 100 101 102 103 104 105 106 107 108 109 110 111 112 113 114 115 116 117 118 119 120 121 122 123 124 125 126 127 128 129 130 131 132 133 134 135 136 137 138 139 140 141 142 143 144 145 146 147 148 149 150 151 152 153 154 155 156 157 158 159 160 161 162 163 164 165 166 167 168 169 170 171 172 173 174 175 176 177 178 179 180 181 182 183 184 185 186 187 188 189 190 191 192 193 194 195 196 197 198 199 200 201 202 203 204 205 206 207 208 209 210 211 212 213 214 215 216 217 218 219 220 221 222 223 224 225 226 227 228 229 230 231 232 233 234 235 236 237 238 239 240 241 242 243 244 245 246 247 248 249 250 251 252 253 254 255 256 257 258 259 260 261 262 263 264 265 266 267 268 269 270 271 272 273 274 275 276 277 278 279 280 281 282 283 284 285 286 287 288 289 290 291 292 293 294 295 296 297 298 299 300 301 302 303 304 305 306 307 308 309 310 311 312 313 314 315 316 317 318 319 320 321 322 323 324 325 326 327 328 329 330 331 332 333 334 335 336 337 338 339 340 341 342 343 344 345 346 347 348 349 350 351 352 353 354 |
$ oc login -u system:admin Logged into "https://172.30.9.22:8443" as "system:admin" using existing credentials. You have access to the following projects and can switch between them with 'oc project <projectname>': auto debug * default openshift-apiserver openshift-controller-manager openshift-core-operators openshift-infra openshift-node openshift-service-cert-signer openshift-web-console quota-test source-project target-project template-project test-project Using project "default". $ oc get clusterrolebinding NAME AGE basic-users 13d cluster-admin 13d cluster-admin-0 13d cluster-admin-1 1d cluster-admin-2 1d cluster-admin-3 1d cluster-admins 13d cluster-readers 13d cluster-status-binding 13d registry-registry-role 13d router-router-role 13d self-access-reviewers 13d self-provisioners 13d system:aws-cloud-provider 13d system:basic-user 13d system:build-strategy-docker-binding 13d system:build-strategy-jenkinspipeline-binding 13d system:build-strategy-source-binding 13d system:controller:attachdetach-controller 13d system:controller:certificate-controller 13d system:controller:clusterrole-aggregation-controller 13d system:controller:cronjob-controller 13d system:controller:daemon-set-controller 13d system:controller:deployment-controller 13d system:controller:disruption-controller 13d system:controller:endpoint-controller 13d system:controller:expand-controller 13d system:controller:generic-garbage-collector 13d system:controller:horizontal-pod-autoscaler 13d system:controller:job-controller 13d system:controller:namespace-controller 13d system:controller:node-controller 13d system:controller:persistent-volume-binder 13d system:controller:pod-garbage-collector 13d system:controller:pv-protection-controller 13d system:controller:pvc-protection-controller 13d system:controller:replicaset-controller 13d system:controller:replication-controller 13d system:controller:resourcequota-controller 13d system:controller:route-controller 13d system:controller:service-account-controller 13d system:controller:service-controller 13d system:controller:statefulset-controller 13d system:controller:ttl-controller 13d system:deployer 13d system:discovery 13d system:discovery-binding 13d system:image-builder 13d system:image-puller 13d system:kube-controller-manager 13d system:kube-dns 13d system:kube-proxy 13d system:kube-scheduler 13d system:masters 13d system:node 13d system:node-admin 13d system:node-admins 13d system:node-bootstrapper 13d system:node-proxier 13d system:node-proxiers 13d system:nodes 13d system:oauth-token-deleters 13d system:openshift:controller:apiservice-cabundle-injector 13d system:openshift:controller:build-config-change-controller 13d system:openshift:controller:build-controller 13d system:openshift:controller:cluster-quota-reconciliation-controller 13d system:openshift:controller:default-rolebindings-controller 13d system:openshift:controller:deployer-controller 13d system:openshift:controller:deploymentconfig-controller 13d system:openshift:controller:horizontal-pod-autoscaler 13d system:openshift:controller:image-import-controller 13d system:openshift:controller:image-trigger-controller 13d system:openshift:controller:ingress-to-route-controller 13d system:openshift:controller:namespace-security-allocation-controller 13d system:openshift:controller:origin-namespace-controller 13d system:openshift:controller:pv-recycler-controller 13d system:openshift:controller:resourcequota-controller 13d system:openshift:controller:sdn-controller 13d system:openshift:controller:service-ingress-ip-controller 13d system:openshift:controller:service-serving-cert-controller 13d system:openshift:controller:service-serving-cert-signer 13d system:openshift:controller:serviceaccount-controller 13d system:openshift:controller:serviceaccount-pull-secrets-controller 13d system:openshift:controller:template-instance-controller 13d system:openshift:controller:template-instance-controller:admin 13d system:openshift:controller:template-instance-finalizer-controller 13d system:openshift:controller:template-instance-finalizer-controller:admin 13d system:openshift:controller:template-service-broker 13d system:openshift:controller:unidling-controller 13d system:openshift:discovery 13d system:openshift:openshift-controller-manager 13d system:openshift:operator:service-cert-signer 13d system:openshift:operator:web-console 13d system:scope-impersonation 13d system:sdn-readers 13d system:volume-scheduler 13d system:webhooks 13d $ oc get clusterrolebinding -o wide NAME AGE ROLE USERS GROUPS SERVICEACCOUNTS basic-users 13d ClusterRole/basic-user system:authenticated cluster-admin 13d ClusterRole/cluster-admin system:masters cluster-admin-0 13d ClusterRole/cluster-admin default/pvinstaller cluster-admin-1 1d ClusterRole/cluster-admin anna cluster-admin-2 1d ClusterRole/cluster-admin lisa cluster-admin-3 1d ClusterRole/cluster-admin admin cluster-admins 13d ClusterRole/cluster-admin system:admin system:cluster-admins cluster-readers 13d ClusterRole/cluster-reader system:cluster-readers cluster-status-binding 13d ClusterRole/cluster-status system:authenticated, system:unauthenticated registry-registry-role 13d ClusterRole/system:registry default/registry router-router-role 13d ClusterRole/system:router default/router self-access-reviewers 13d ClusterRole/self-access-reviewer system:authenticated, system:unauthenticated self-provisioners 13d ClusterRole/self-provisioner system:authenticated:oauth system:aws-cloud-provider 13d ClusterRole/system:aws-cloud-provider kube-system/aws-cloud-provider system:basic-user 13d ClusterRole/system:basic-user system:authenticated, system:unauthenticated system:build-strategy-docker-binding 13d ClusterRole/system:build-strategy-docker system:authenticated system:build-strategy-jenkinspipeline-binding 13d ClusterRole/system:build-strategy-jenkinspipeline system:authenticated system:build-strategy-source-binding 13d ClusterRole/system:build-strategy-source system:authenticated system:controller:attachdetach-controller 13d ClusterRole/system:controller:attachdetach-controller kube-system/attachdetach-controller system:controller:certificate-controller 13d ClusterRole/system:controller:certificate-controller kube-system/certificate-controller system:controller:clusterrole-aggregation-controller 13d ClusterRole/system:controller:clusterrole-aggregation-controll er kube-system/clusterrole-aggregation-controller system:controller:cronjob-controller 13d ClusterRole/system:controller:cronjob-controller kube-system/cronjob-controller system:controller:daemon-set-controller 13d ClusterRole/system:controller:daemon-set-controller kube-system/daemon-set-controller system:controller:deployment-controller 13d ClusterRole/system:controller:deployment-controller kube-system/deployment-controller system:controller:disruption-controller 13d ClusterRole/system:controller:disruption-controller kube-system/disruption-controller system:controller:endpoint-controller 13d ClusterRole/system:controller:endpoint-controller kube-system/endpoint-controller system:controller:expand-controller 13d ClusterRole/system:controller:expand-controller kube-system/expand-controller system:controller:generic-garbage-collector 13d ClusterRole/system:controller:generic-garbage-collector kube-system/generic-garbage-collector system:controller:horizontal-pod-autoscaler 13d ClusterRole/system:controller:horizontal-pod-autoscaler kube-system/horizontal-pod-autoscaler, openshi ft-infra/horizontal-pod-autoscaler system:controller:job-controller 13d ClusterRole/system:controller:job-controller kube-system/job-controller system:controller:namespace-controller 13d ClusterRole/system:controller:namespace-controller kube-system/namespace-controller system:controller:node-controller 13d ClusterRole/system:controller:node-controller kube-system/node-controller system:controller:persistent-volume-binder 13d ClusterRole/system:controller:persistent-volume-binder kube-system/persistent-volume-binder system:controller:pod-garbage-collector 13d ClusterRole/system:controller:pod-garbage-collector kube-system/pod-garbage-collector system:controller:pv-protection-controller 13d ClusterRole/system:controller:pv-protection-controller kube-system/pv-protection-controller system:controller:pvc-protection-controller 13d ClusterRole/system:controller:pvc-protection-controller kube-system/pvc-protection-controller system:controller:replicaset-controller 13d ClusterRole/system:controller:replicaset-controller kube-system/replicaset-controller system:controller:replication-controller 13d ClusterRole/system:controller:replication-controller kube-system/replication-controller system:controller:resourcequota-controller 13d ClusterRole/system:controller:resourcequota-controller kube-system/resourcequota-controller system:controller:route-controller 13d ClusterRole/system:controller:route-controller kube-system/route-controller system:controller:service-account-controller 13d ClusterRole/system:controller:service-account-controller kube-system/service-account-controller system:controller:service-controller 13d ClusterRole/system:controller:service-controller kube-system/service-controller system:controller:statefulset-controller 13d ClusterRole/system:controller:statefulset-controller kube-system/statefulset-controller system:controller:ttl-controller 13d ClusterRole/system:controller:ttl-controller kube-system/ttl-controller system:deployer 13d ClusterRole/system:deployer openshift-infra/default-rolebindings-controlle r system:discovery 13d ClusterRole/system:discovery system:authenticated, system:unauthenticated system:discovery-binding 13d ClusterRole/system:discovery system:image-builder 13d ClusterRole/system:image-builder openshift-infra/default-rolebindings-controlle r system:image-puller 13d ClusterRole/system:image-puller openshift-infra/default-rolebindings-controlle r system:kube-controller-manager 13d ClusterRole/system:kube-controller-manager system:kube-controller-manager system:kube-dns 13d ClusterRole/system:kube-dns kube-system/kube-dns system:kube-proxy 13d ClusterRole/system:node-proxier system:nodes kube-proxy/kube-proxy system:kube-scheduler 13d ClusterRole/system:kube-scheduler system:kube-scheduler system:masters 13d ClusterRole/system:master system:masters system:node 13d ClusterRole/system:node system:node-admin 13d ClusterRole/system:node-admin system:master system:node-admins system:node-admins 13d ClusterRole/system:node-admin system:master system:node-admins system:node-bootstrapper 13d ClusterRole/system:node-bootstrapper openshift-infra/node-bootstrapper system:node-proxier 13d ClusterRole/system:node-proxier system:kube-proxy system:node-proxiers 13d ClusterRole/system:node-proxier system:nodes system:nodes 13d ClusterRole/system:node system:oauth-token-deleters 13d ClusterRole/system:oauth-token-deleter system:authenticated, system:unauthenticated system:openshift:controller:apiservice-cabundle-injector 13d ClusterRole/system:openshift:controller:apiservice-cabundle-in jector openshift-service-cert-signer/apiservice-cabun dle-injector-sa system:openshift:controller:build-config-change-controller 13d ClusterRole/system:openshift:controller:build-config-change-co ntroller openshift-infra/build-config-change-controller system:openshift:controller:build-controller 13d ClusterRole/system:openshift:controller:build-controller openshift-infra/build-controller system:openshift:controller:cluster-quota-reconciliation-controller 13d ClusterRole/system:openshift:controller:cluster-quota-reconcil iation-controller openshift-infra/cluster-quota-reconciliation-c ontroller system:openshift:controller:default-rolebindings-controller 13d ClusterRole/system:openshift:controller:default-rolebindings-c ontroller openshift-infra/default-rolebindings-controlle r system:openshift:controller:deployer-controller 13d ClusterRole/system:openshift:controller:deployer-controller openshift-infra/deployer-controller system:openshift:controller:deploymentconfig-controller 13d ClusterRole/system:openshift:controller:deploymentconfig-contr oller openshift-infra/deploymentconfig-controller system:openshift:controller:horizontal-pod-autoscaler 13d ClusterRole/system:openshift:controller:horizontal-pod-autosca ler openshift-infra/horizontal-pod-autoscaler system:openshift:controller:image-import-controller 13d ClusterRole/system:openshift:controller:image-import-controlle r openshift-infra/image-import-controller system:openshift:controller:image-trigger-controller 13d ClusterRole/system:openshift:controller:image-trigger-controll er openshift-infra/image-trigger-controller system:openshift:controller:ingress-to-route-controller 13d ClusterRole/system:openshift:controller:ingress-to-route-contr oller openshift-infra/ingress-to-route-controller system:openshift:controller:namespace-security-allocation-controller 13d ClusterRole/system:openshift:controller:namespace-security-all ocation-controller openshift-infra/namespace-security-allocation- controller system:openshift:controller:origin-namespace-controller 13d ClusterRole/system:openshift:controller:origin-namespace-contr oller openshift-infra/origin-namespace-controller system:openshift:controller:pv-recycler-controller 13d ClusterRole/system:openshift:controller:pv-recycler-controller openshift-infra/pv-recycler-controller system:openshift:controller:resourcequota-controller 13d ClusterRole/system:openshift:controller:resourcequota-controll er openshift-infra/resourcequota-controller system:openshift:controller:sdn-controller 13d ClusterRole/system:openshift:controller:sdn-controller openshift-infra/sdn-controller system:openshift:controller:service-ingress-ip-controller 13d ClusterRole/system:openshift:controller:service-ingress-ip-con troller openshift-infra/service-ingress-ip-controller system:openshift:controller:service-serving-cert-controller 13d ClusterRole/system:openshift:controller:service-serving-cert-c ontroller openshift-infra/service-serving-cert-controlle r system:openshift:controller:service-serving-cert-signer 13d ClusterRole/system:openshift:controller:service-serving-cert-s igner openshift-service-cert-signer/service-serving- cert-signer-sa system:openshift:controller:serviceaccount-controller 13d ClusterRole/system:openshift:controller:serviceaccount-control ler openshift-infra/serviceaccount-controller system:openshift:controller:serviceaccount-pull-secrets-controller 13d ClusterRole/system:openshift:controller:serviceaccount-pull-se crets-controller openshift-infra/serviceaccount-pull-secrets-co ntroller system:openshift:controller:template-instance-controller 13d ClusterRole/system:openshift:controller:template-instance-cont roller openshift-infra/template-instance-controller system:openshift:controller:template-instance-controller:admin 13d ClusterRole/admin openshift-infra/template-instance-controller system:openshift:controller:template-instance-finalizer-controller 13d ClusterRole/system:openshift:controller:template-instance-fina lizer-controller openshift-infra/template-instance-finalizer-co ntroller system:openshift:controller:template-instance-finalizer-controller:admin 13d ClusterRole/admin openshift-infra/template-instance-finalizer-co ntroller system:openshift:controller:template-service-broker 13d ClusterRole/system:openshift:controller:template-service-broke r openshift-infra/template-service-broker system:openshift:controller:unidling-controller 13d ClusterRole/system:openshift:controller:unidling-controller openshift-infra/unidling-controller system:openshift:discovery 13d ClusterRole/system:openshift:discovery system:authenticated, system:unauthenticated system:openshift:openshift-controller-manager 13d ClusterRole/system:openshift:openshift-controller-manager openshift-controller-manager/openshift-control ler-manager system:openshift:operator:service-cert-signer 13d ClusterRole/cluster-admin openshift-core-operators/openshift-service-cer t-signer-operator system:openshift:operator:web-console 13d ClusterRole/cluster-admin openshift-core-operators/openshift-web-console -operator system:scope-impersonation 13d ClusterRole/system:scope-impersonation system:authenticated, system:unauthenticated system:sdn-readers 13d ClusterRole/system:sdn-reader system:nodes system:volume-scheduler 13d ClusterRole/system:volume-scheduler system:kube-scheduler system:webhooks 13d ClusterRole/system:webhook system:authenticated, system:unauthenticated $ oc get clusterrolebinding -o wide | grep 'self-provisioner' self-provisioners 13d ClusterRole/self-provisioner system:authenticated:oauth $ oc describe clusterrolebindings self-provisioners Name: self-provisioners Labels: <none> Annotations: rbac.authorization.kubernetes.io/autoupdate=true Role: Kind: ClusterRole Name: self-provisioner Subjects: Kind Name Namespace ---- ---- --------- Group system:authenticated:oauth $ oc adm policy remmove-cluster-role-from-group self-provisioner system:authenticated:oauth error: unknown command "remmove-cluster-role-from-group self-provisioner system:authenticated:oauth" See 'oc adm policy -h' for help and examples. $ oc adm policy remove-cluster-role-from-group self-provisioner system:authenticated:oauth Warning: Your changes may get lost whenever a master is restarted, unless you prevent reconciliation of this rolebinding using the following comman d: oc annotate clusterrolebinding.rbac self-provisioners 'rbac.authorization.kubernetes.io/autoupdate=false' --overwritecluster role "self-provisio ner" removed: "system:authenticated:oauth" $ oc describe clusterrolebindings self-provisioners Error from server (NotFound): clusterrolebindings.rbac.authorization.k8s.io "self-provisioners" not found $ oc login -u linda -p password Login successful. You don't have any projects. Contact your system administrator to request a project. $ oc login -u admin -p password Login successful. You have access to the following projects and can switch between them with 'oc project <projectname>': auto debug * default openshift openshift-apiserver openshift-controller-manager openshift-core-operators openshift-infra openshift-node openshift-service-cert-signer openshift-web-console quota-test source-project target-project template-project test-project Using project "default". [root@okd ~]# [root@okd ~]# oc new-project authorization-rbac Now using project "authorization-rbac" on server "https://172.30.9.22:8443". You can add applications to this project with the 'new-app' command. For example, try: oc new-app centos/ruby-25-centos7~https://github.com/sclorg/ruby-ex.git to build a new example application in Ruby. $ oc policy add-role-to-user admin linda role "admin" added: "linda" $ oc adm groups new dev-group group.user.openshift.io/dev-group created $ oc adm groups add-users dev-group anouk group "dev-group" added: "anouk" $ oc adm groups new qa-group group.user.openshift.io/qa-group created $ oc adm groups add-users qa-group lisa group "qa-group" added: "lisa" $ oc get groups NAME USERS dev-group anouk developers anna qa-group lisa [root@okd ~]# [root@okd ~]# oc login -u anna -p passwords Login successful. You have access to the following projects and can switch between them with 'oc project <projectname>': * authorization-rbac openshift openshift-apiserver openshift-controller-manager openshift-core-operators openshift-infra openshift-node openshift-service-cert-signer openshift-web-console quota-test source-project target-project template-project test-project Using project "authorization-rbac". $ oc policy add-role-to-group edit dev-group role "edit" added: "dev-group" $ oc policy add-role-to-group view qa-group role "view" added: "qa-group" $ oc get rolebindings -o wide NAME AGE ROLE USERS GROUPS SERVICEACCOUNTS admin 3m ClusterRole/admin admin admin-0 3m ClusterRole/admin linda edit 51s ClusterRole/edit dev-group system:deployers 3m ClusterRole/system:deployer authorization-rbac/deplo yer system:image-builders 3m ClusterRole/system:image-builder authorization-rbac/build er system:image-pullers 3m ClusterRole/system:image-puller system:serviceaccounts:authorization-rbac view 26s ClusterRole/view qa-group $ oc adm policy add-cluster-role-to-group --rolebinding-name self-provisioners self-provisioners system:authenticated:oauth Warning: role 'self-provisioners' not found Warning: Group 'system:authenticated:oauth' not found cluster role "self-provisioners" added: "system:authenticated:oauth" |
Creating Roles
- New roles can be created by assigning verbs and resources to the newly created role
oc create role podview --verb-get --resource-pod -n userstuffoc adm policy add-role-to-user podview ahmed --role-namespace=userstuff -n userstuff • oc create clusterrole podviewonly --verb-get --resource=podoc adm policy add-cluster-role-to-user podviewonly lori
|
1 2 3 4 5 6 7 8 9 10 11 12 13 14 15 16 17 18 19 20 21 |
$ oc new-project userstaff Now using project "userstaff" on server "https://172.30.9.22:8443". You can add applications to this project with the 'new-app' command. For example, try: oc new-app centos/ruby-25-centos7~https://github.com/sclorg/ruby-ex.git to build a new example application in Ruby. $ oc create role podview --verb=get --resource=pod -n userstaff role.rbac.authorization.k8s.io/podview created $ oc adm policy add-role-to-user podview ahmed --role-namespace=userstaff -n userstaff Warning: User 'ahmed' not found role "podview" added: "ahmed" $ oc create clusterrole podviewonly --verb=get --resource=pod clusterrole.rbac.authorization.k8s.io/podviewonly created $ oc adm policy add-cluster-role-to-user podviewonly lori cluster role "podviewonly" added: "lori" |