

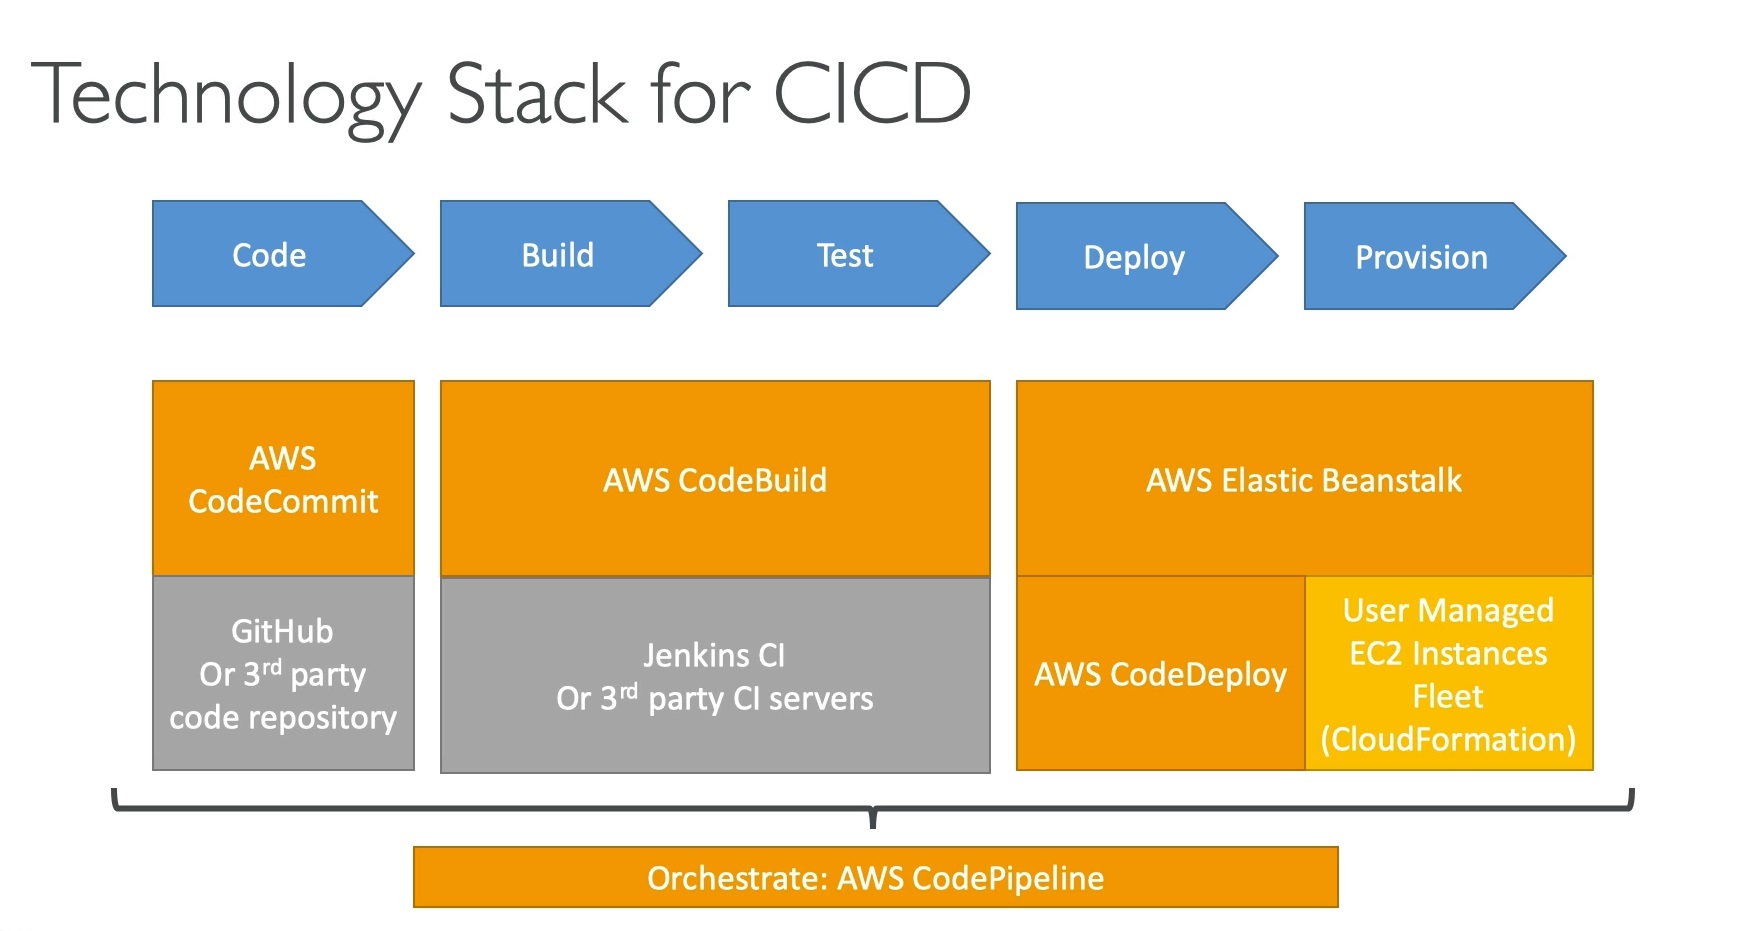
- Continuous delivery
- Visual workflow
- Source: GitHub / CodeCommit / Amazon S3
- Build: CodeBuild / Jenkins / etc …
- Load Testing: 3 rd party tools
- Deploy: AWS CodeDeploy / Beanstalk / CloudFormation / ECS …
- Made of stages:
- Each stage can have sequential actions and / or parallel actions
- Stages examples: Build /Test / Deploy / Load Test / etc …
- Manual approval can be defined at any stage
AWS CodePipeline Artifacts
- Each pipeline stage can create “artifacts”
- Artifacts are passed stored in Amazon S3 and passed on to the next stage
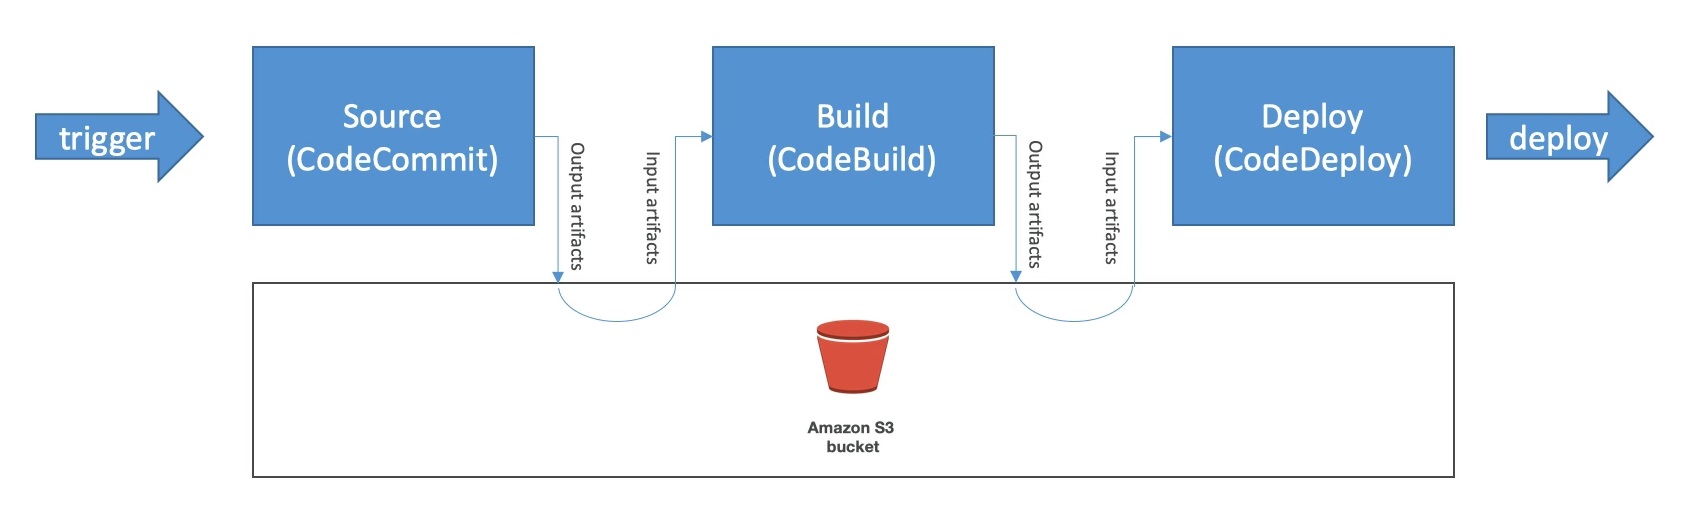
We have code in CodeCommit. W are able to deploy this code using CodeDeploy but first we need to package as an archive the code in S3 in order for the deployment to work. We want to automate the transition from CodeCommit into CodeDeploy. Let’s start with the first pipeline:
Developer Tools -> CodePipeline -> Pipelines -> Create new pipeline
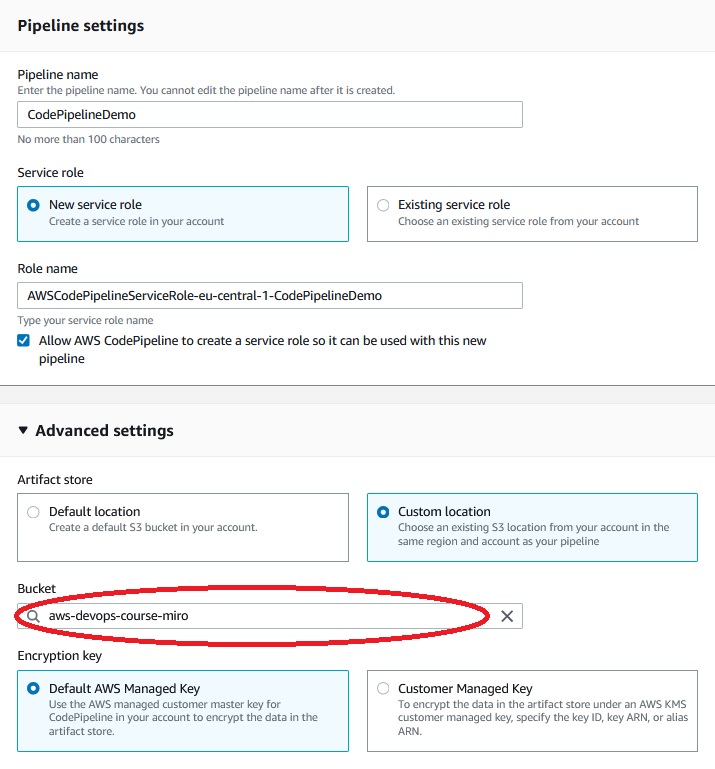
From advanced settings it is better to choose “Custom location” because if we choose “Default location” everytime we will use new bucket for every pipeline and we will reach the limit of buckets in our account.
Next ->
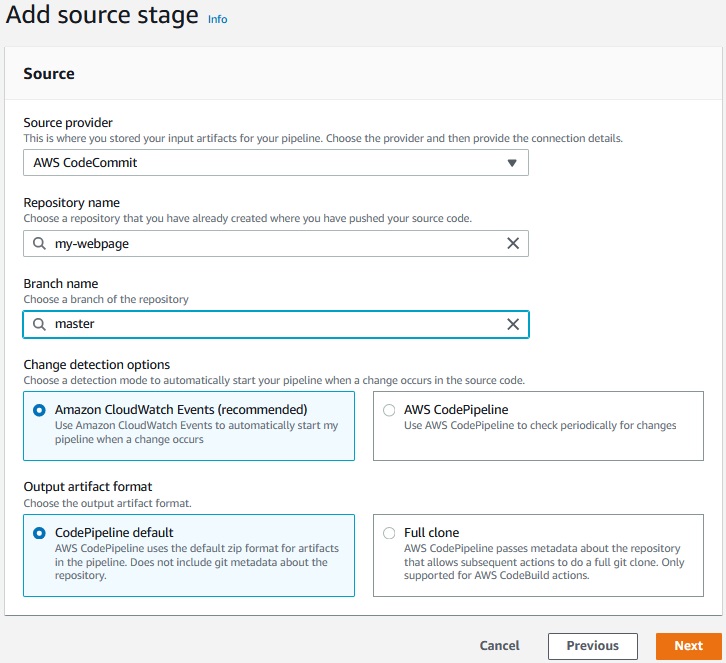
Next -> Skip build stage
Next -> Create pipeline ->
Now if we change the content of any file in my-webpage in CodeCommit repository
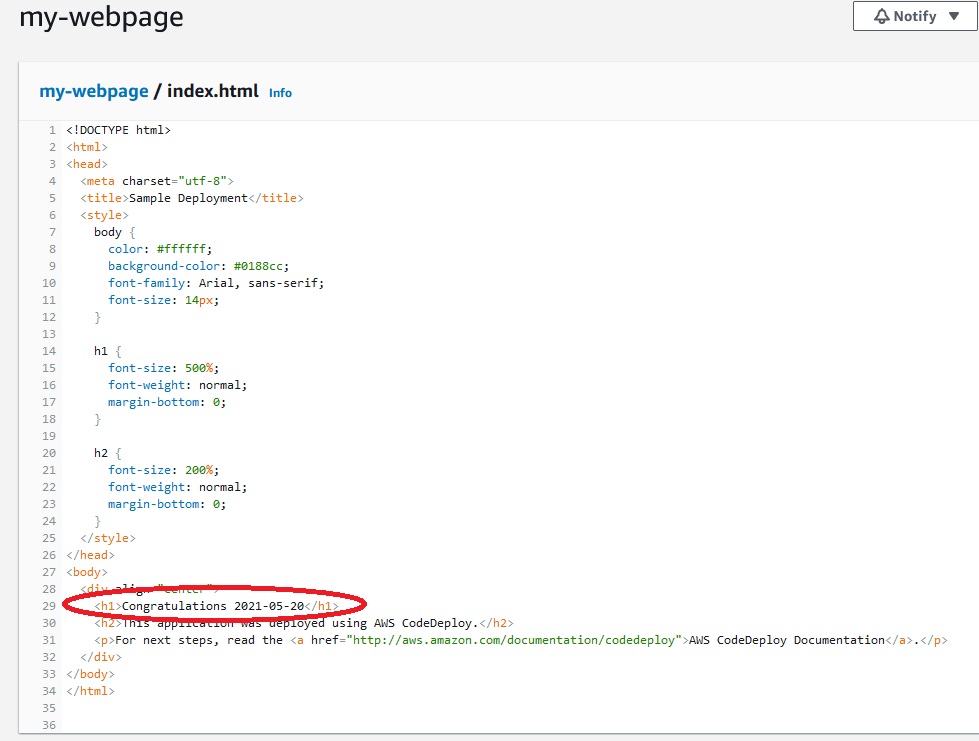
then CodePipeline will start deploying new version of application.
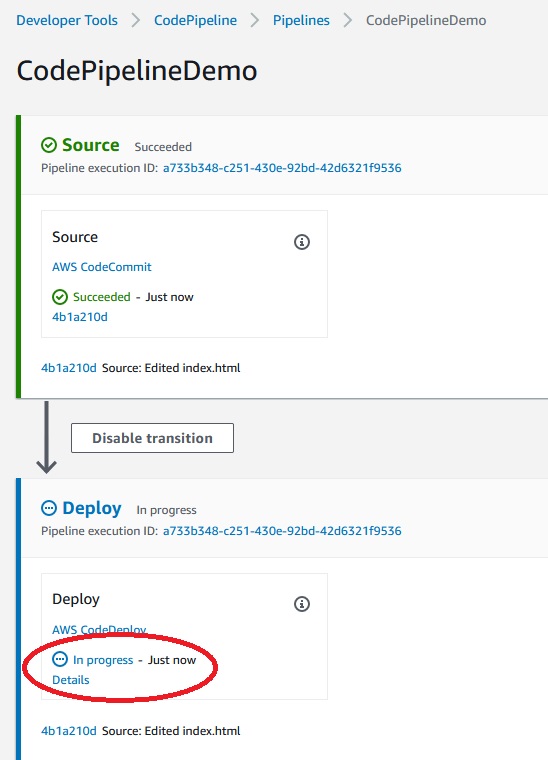
After deployment finishes we will see the new version of an application:

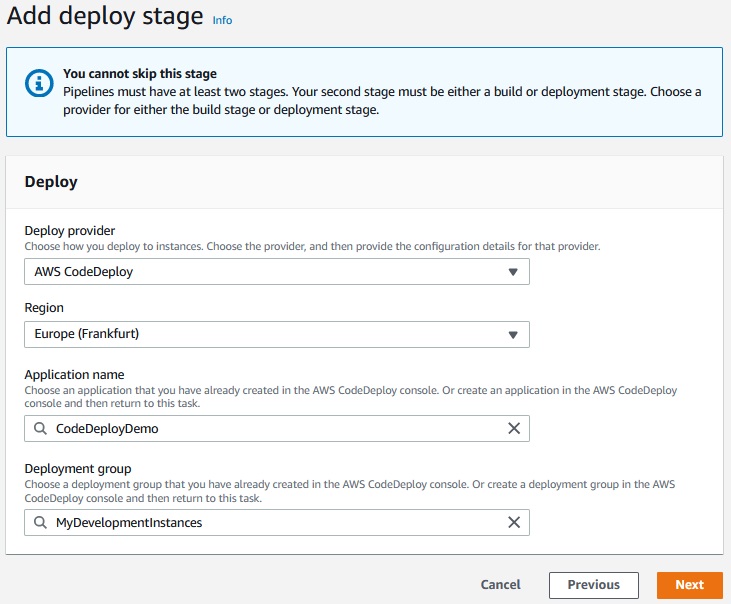
Adding CodeBuild Stage.
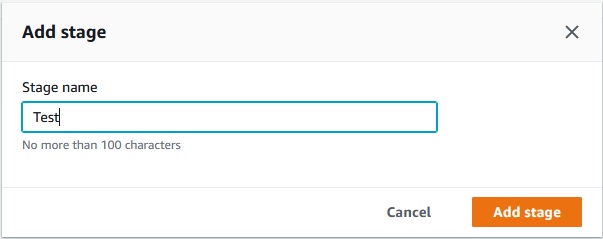
Developer Tools -> CodePipeline -> Pipelines -> CodePipelineDemo -> Edit CodePipelineDemo -> Add stage
Add action group ->

Done -> Save -> Save
Now we can ruun new pipeline by clicking on “Release change”.
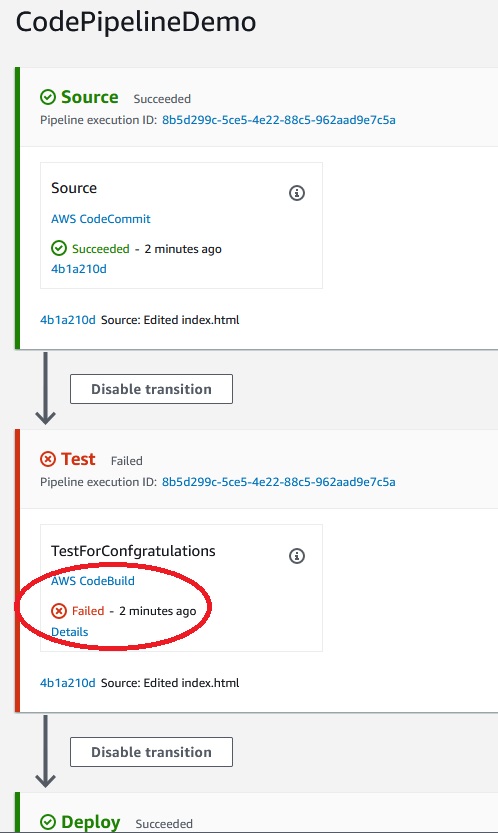
But we have an error:
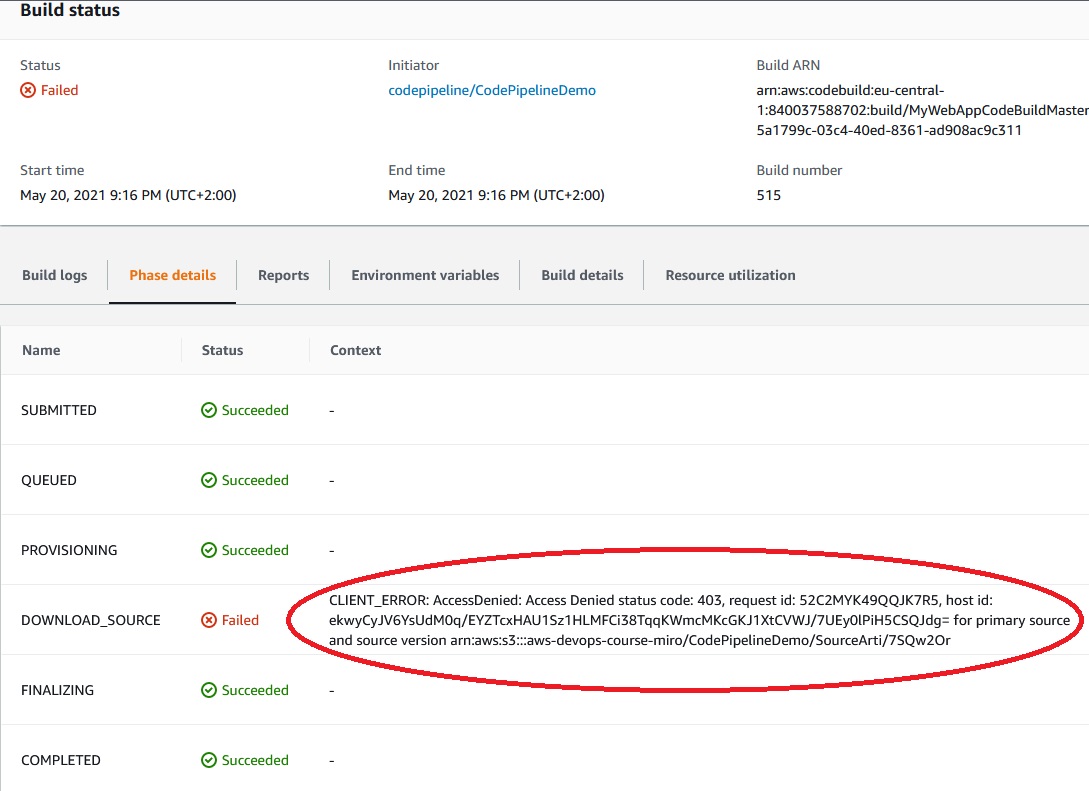
We have a problem on access to the s3 bucket so let’s modify the
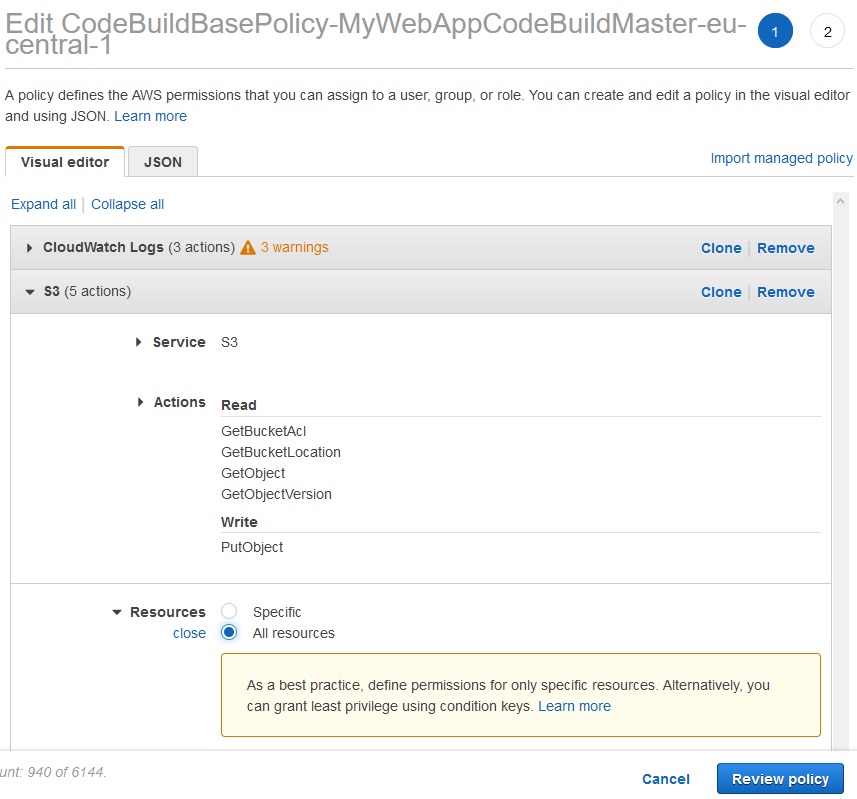
Review policy -> save changes
Now we can test the pipeline again by clicking on "Release change".
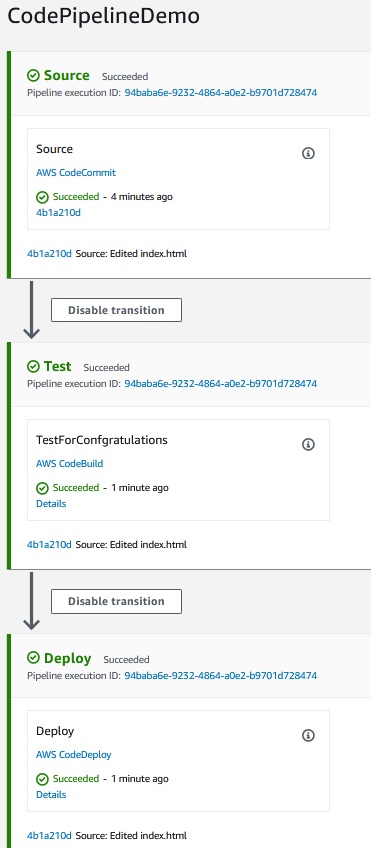
This time everything is ok.
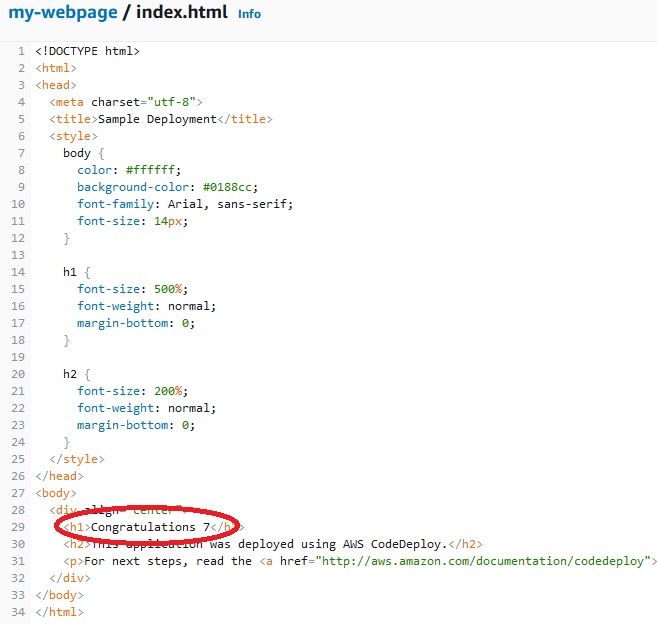
Now in the repository let’s change the index.html:
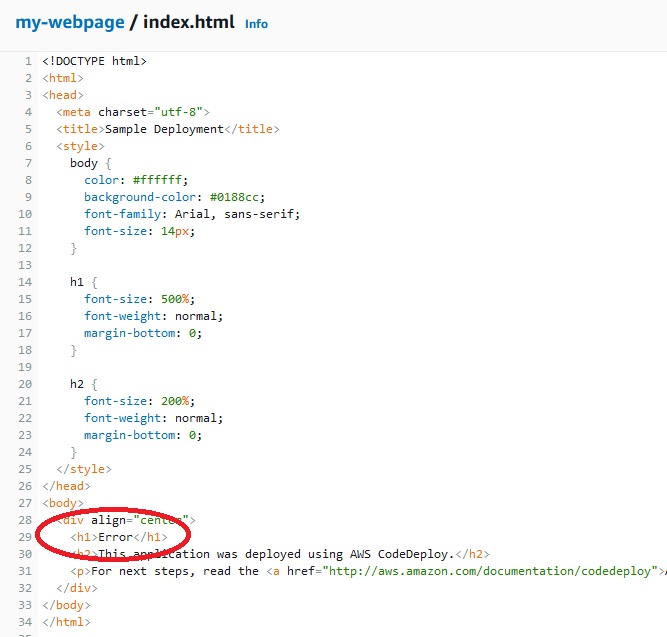
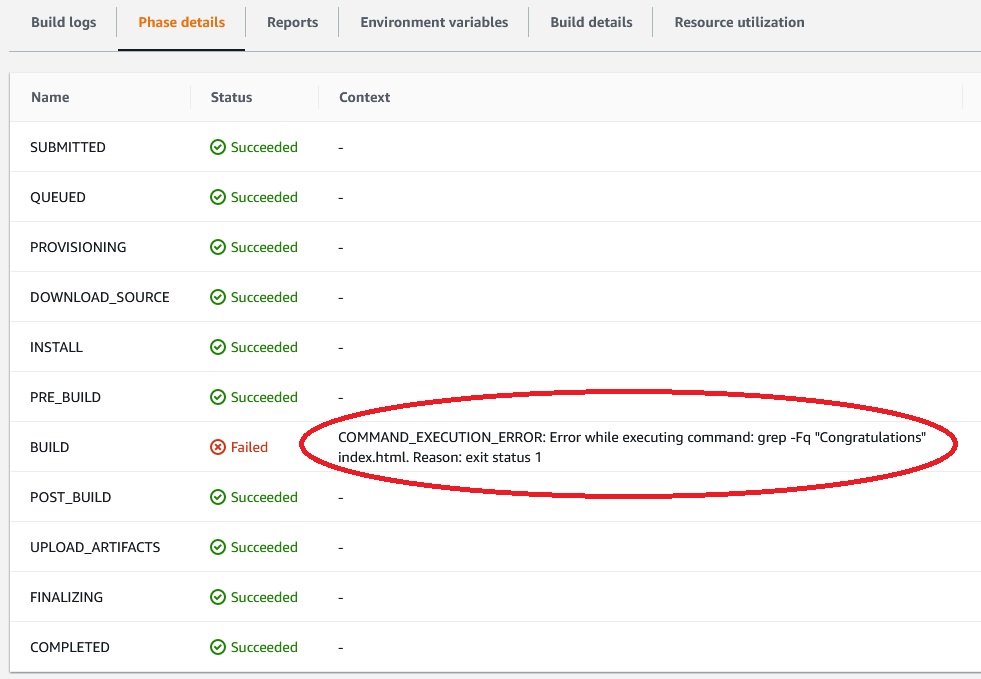
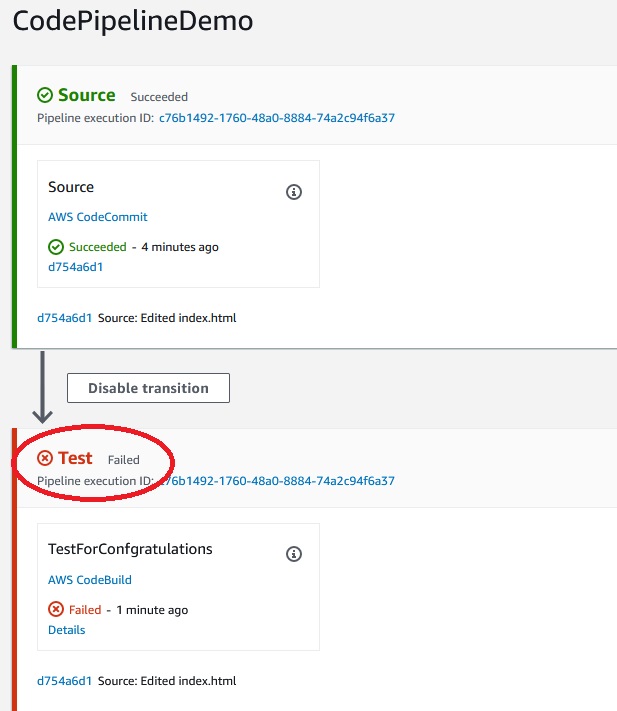
Because buildspec.yml test if index.html consist “Congratulations” word the test failed:
If we want to have artifacts in additional s3 bucket we must edit the pipline:
Developer Tools -> CodePipeline -> Pipelines -> CodePipelineDemo -> Edit CodePipelineDemo -> Edit deploy -> Edit stage -> Add action
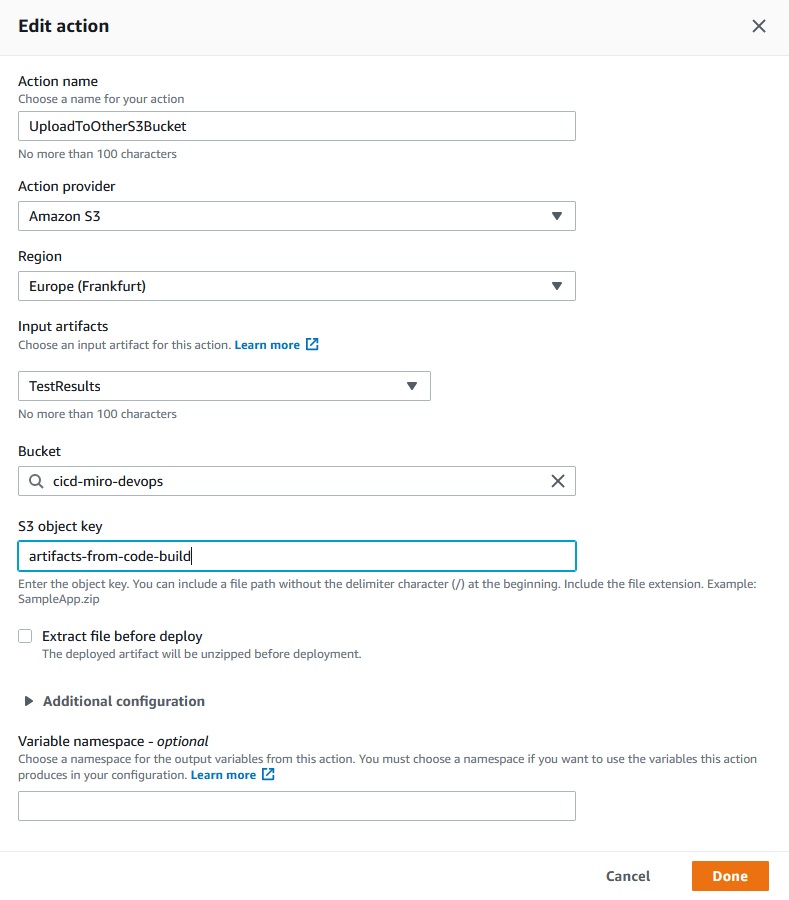
Done ->
Now we have added parallel stage to our pipeline:
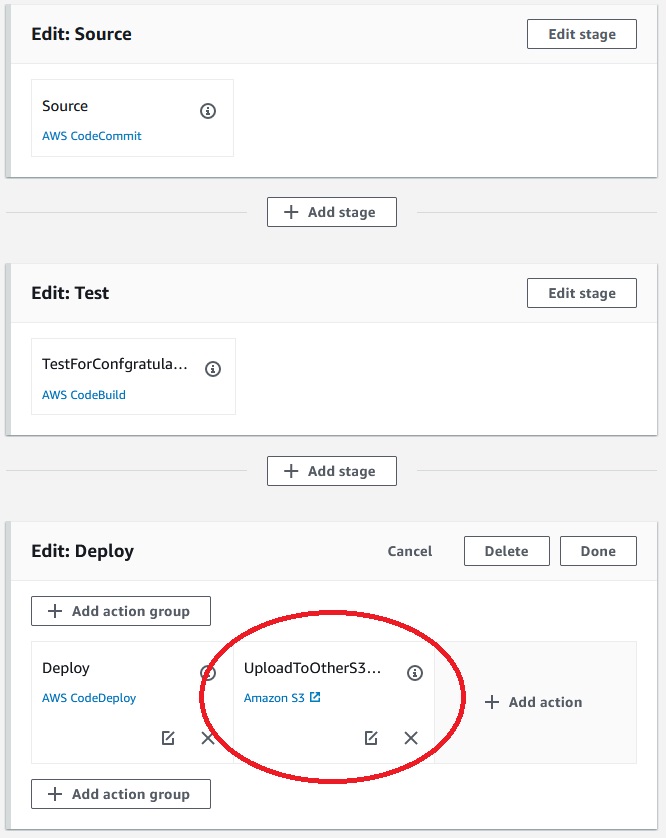
Save -> Save ->
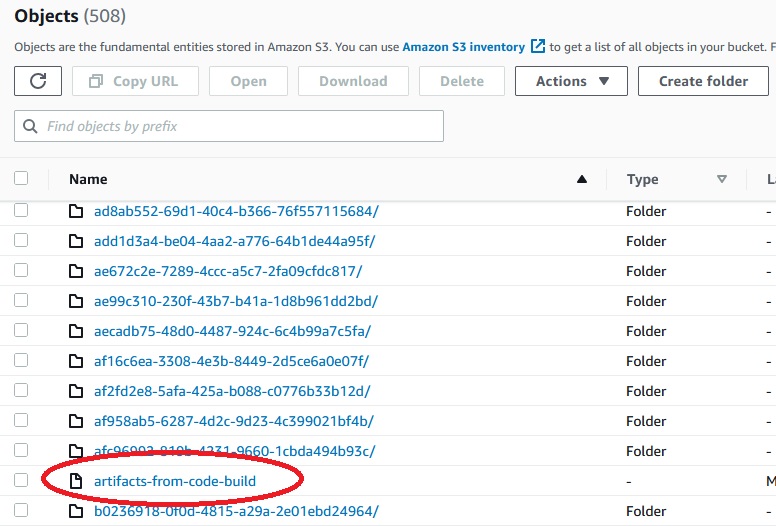
Let’s change the index.html once again:
After pipeline finish the work on the additional s3bucket we will see folder with artifacts:
Manual Approval Steps
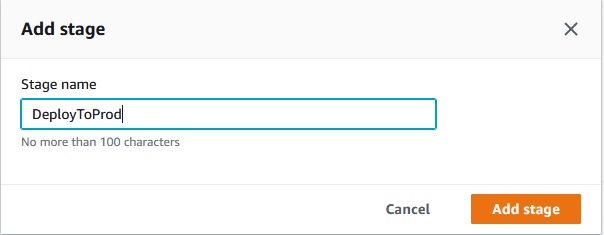
We can add additional stage and deploy to production.
Developer Tools -> CodePipeline -> Pipelines -> CodePipelineDemo -> Edit CodePipelineDemo -> Add Stage
Add action group ->
Done ->
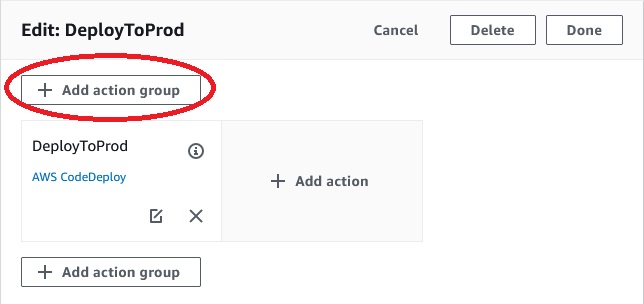
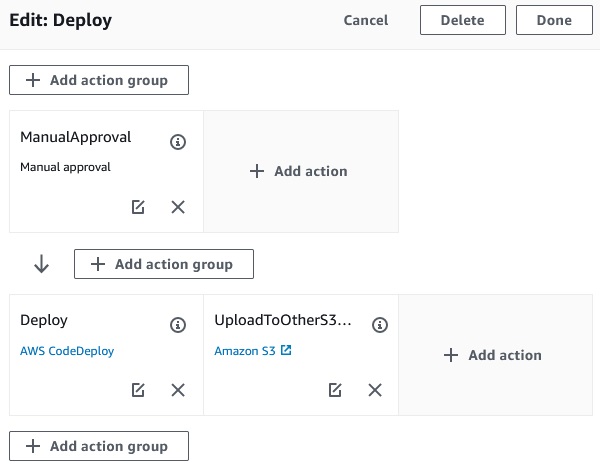
If we want ManualApproval step before deployment to production we should click on the “Add action group” button:
And then 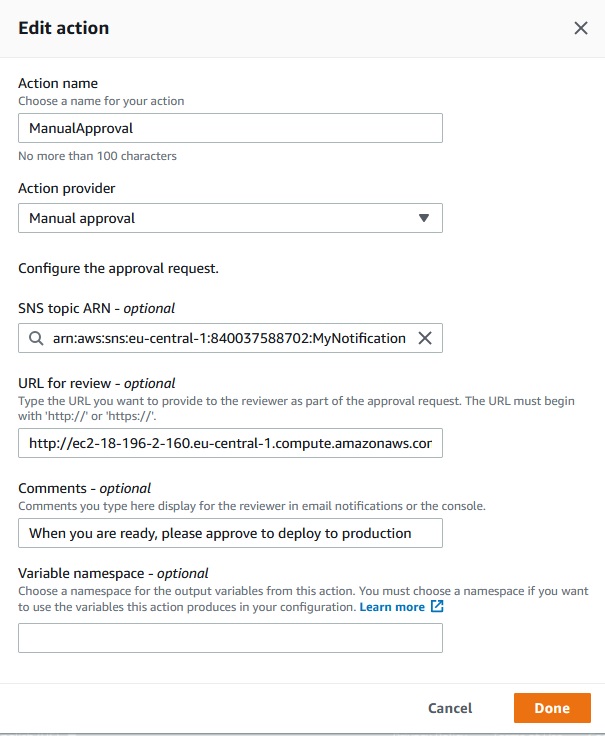
In the “URL for review” you can put URL of the application to approve. If the site is good you will approve the deployment.
Done ->
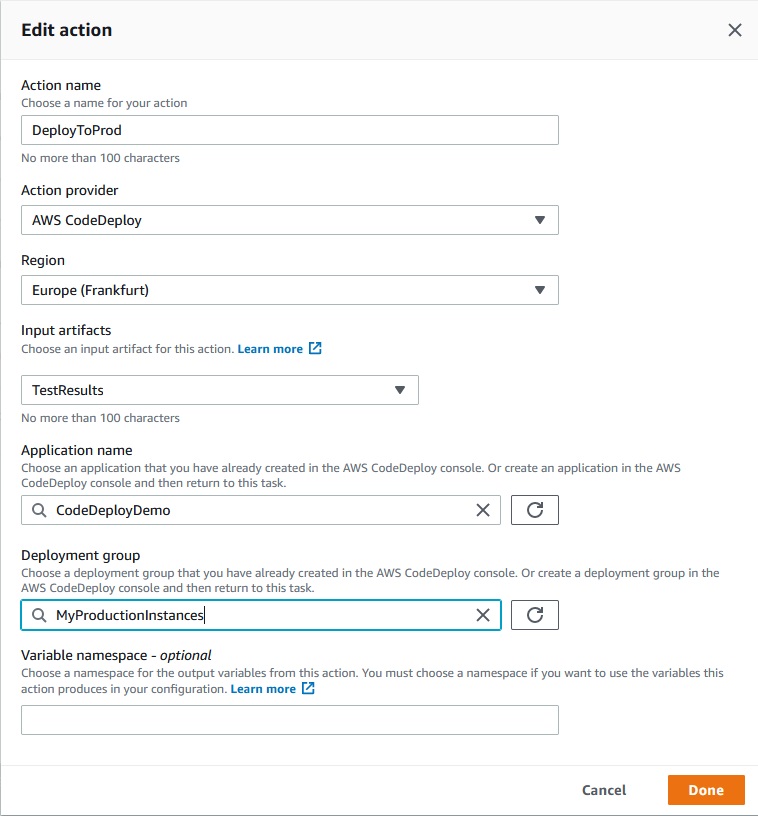
Now, the last stage looks like:
Save -> Save

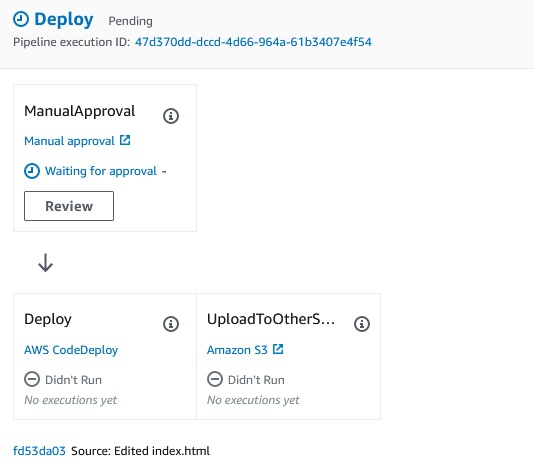
Now we can test our new pipeline by clicking "Release change" and "Release".
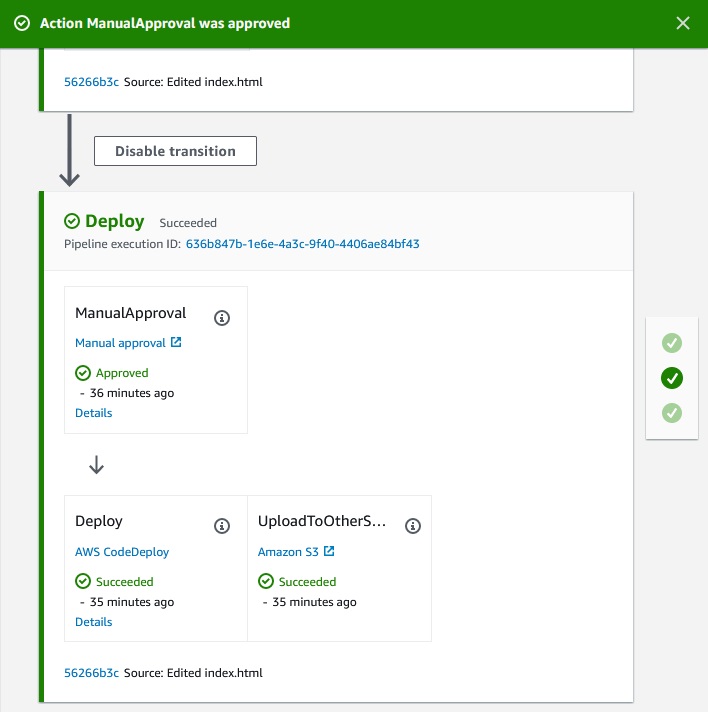
In the DeployToProd stage we are waiting for manual approval before instances are deploy to production:
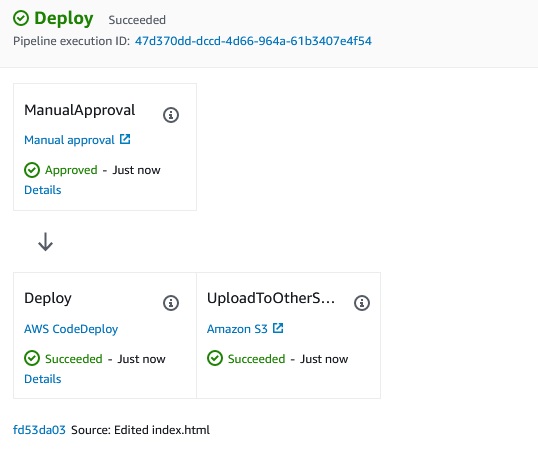
When wwe click on the Review button we can see URL with the new version ofthe application and approve it.

Approve ->
After the deployment will be approved the deployment should happend.
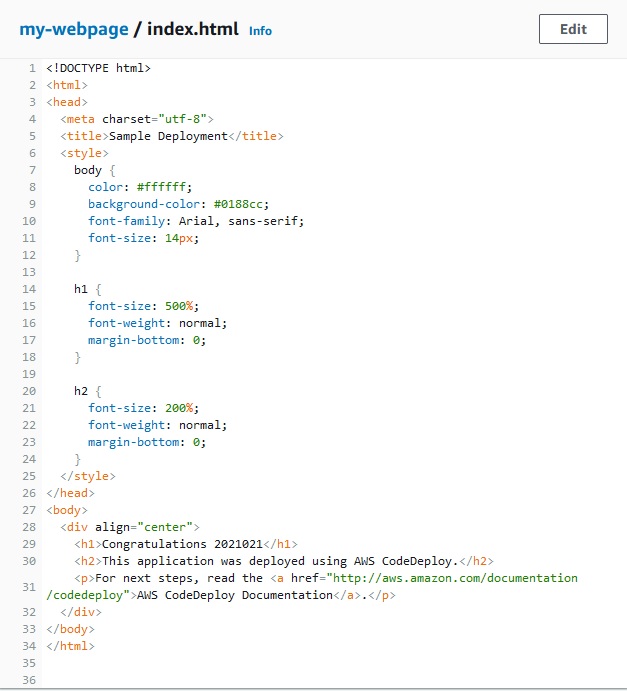
Let’s test our pipeline with manual approval. First we change the index.html:
After we change the index.html file the pipeline starts automaticaly.
After we Approve the changes we can see such an appllication:

CloudWatch Events Integration
We can invoke CodePipieline in the schedule. For example we can invoke pipeline one time a day:

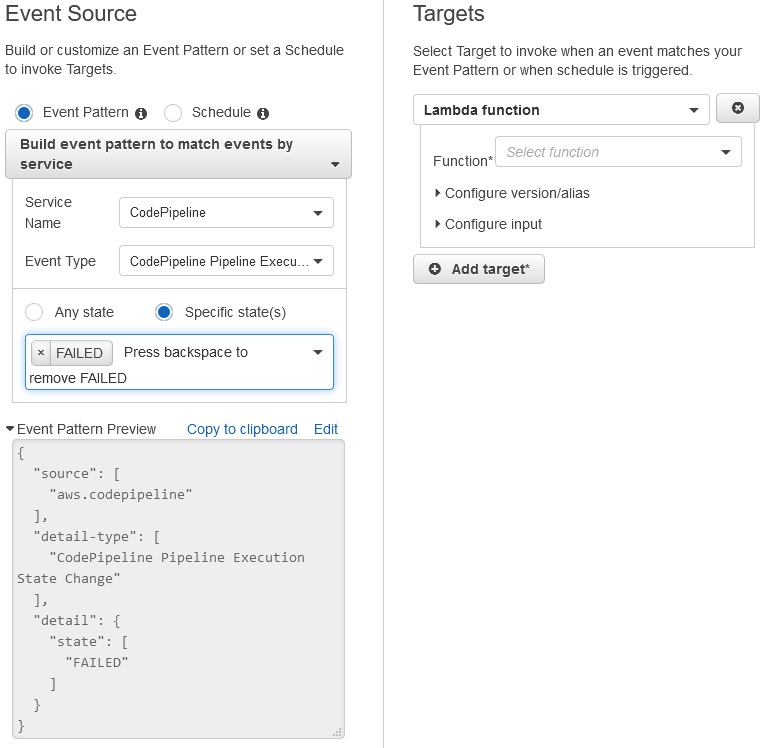
If in the pipeline is failure we can invoke Lambda function e.g. to inform the slack channel.
Custom Action Jobs with AWS Lambda
We have to create a lambda funcion.
Lambda -> Functions -> Create function
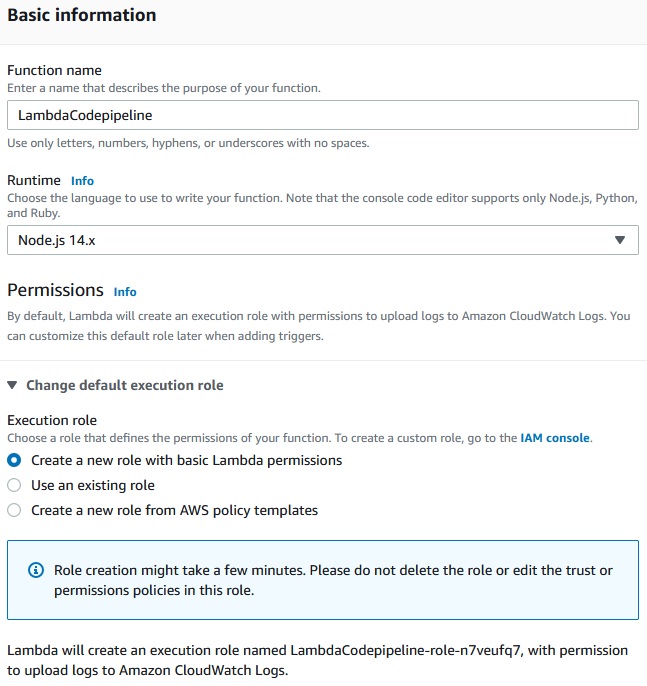
Create function ->
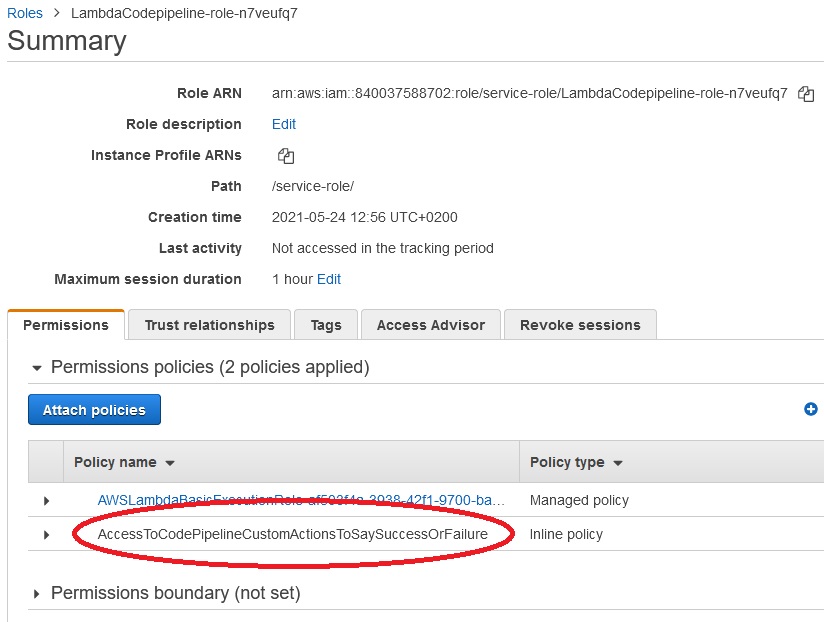
After we create our lambda function we need to edit newly created role.
IAM -> Roles
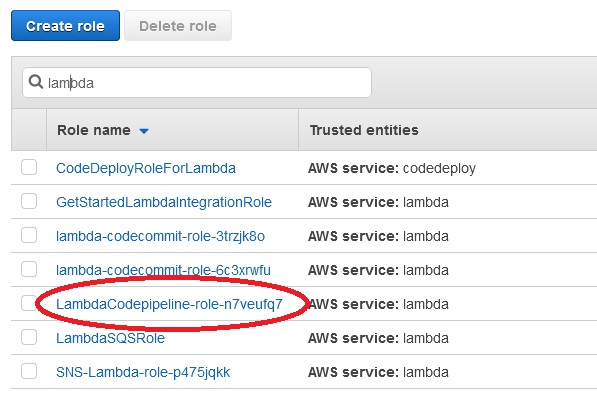
Roles -> LambdaCodepipeline-role-n7veufq7 -> Add inline policy -> JSON
Copy from references link (3) code:
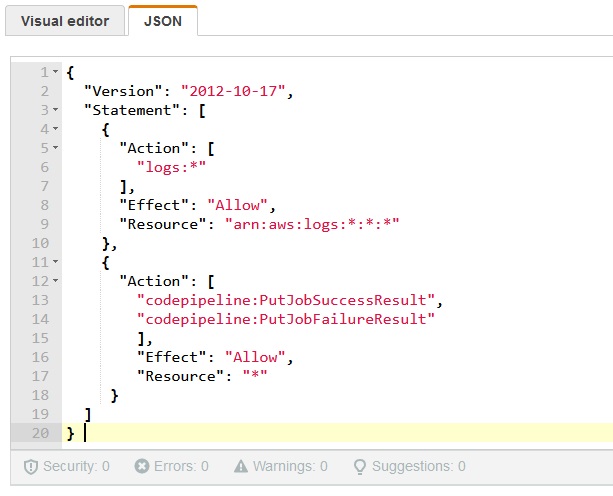
Review policy ->
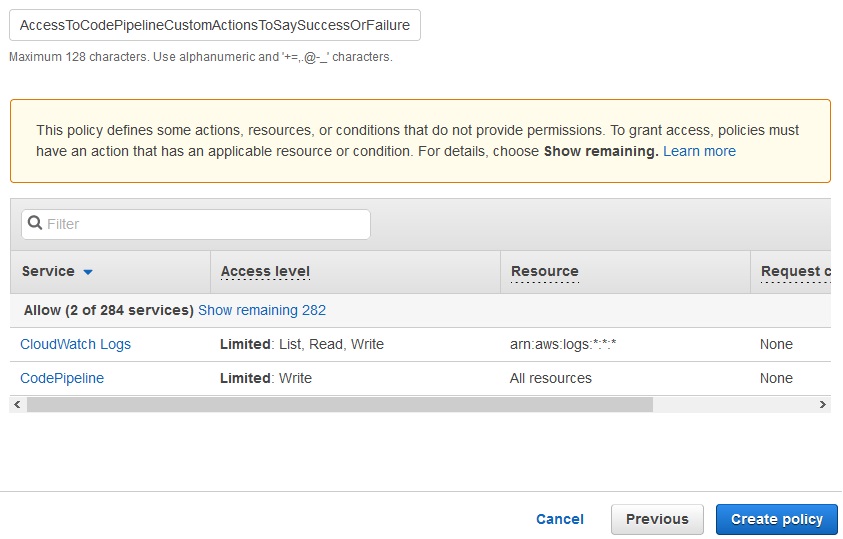
Create policy ->
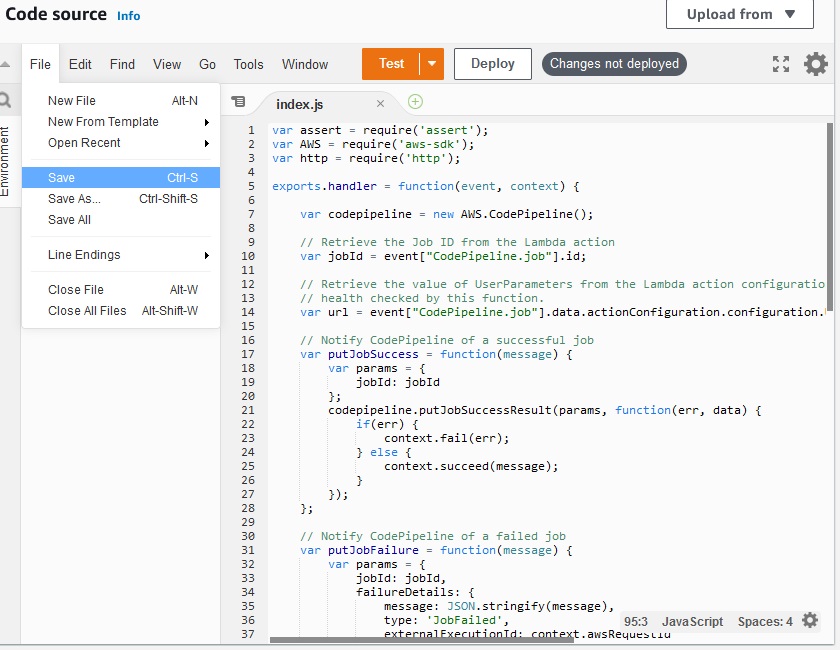
Back to the lambda function and we have to edit the code. Copy the code from references link 3 and save.
Now, we must edit our pipeline.
Developer Tools -> CodePipeline -> Pipelines -> CodePipelineDemo -> Edit CodePipelineDemo -> Edit Deploy -> Add stage ->
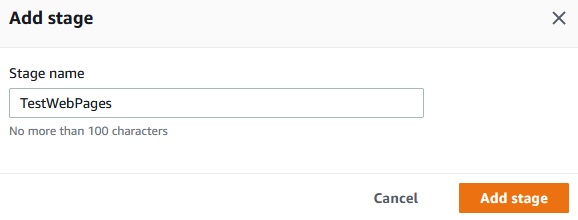
Add stage
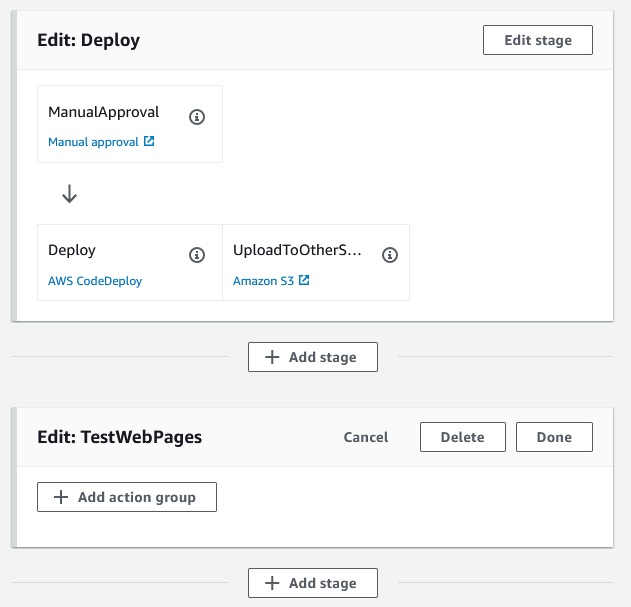
Add action group ->
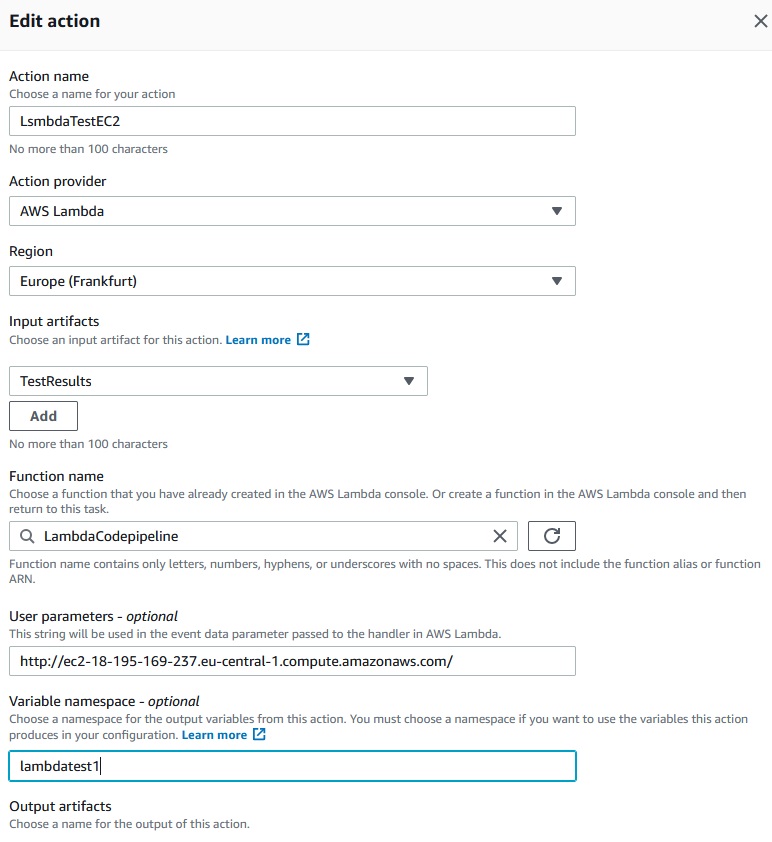
Done ->
Now we add paralel action
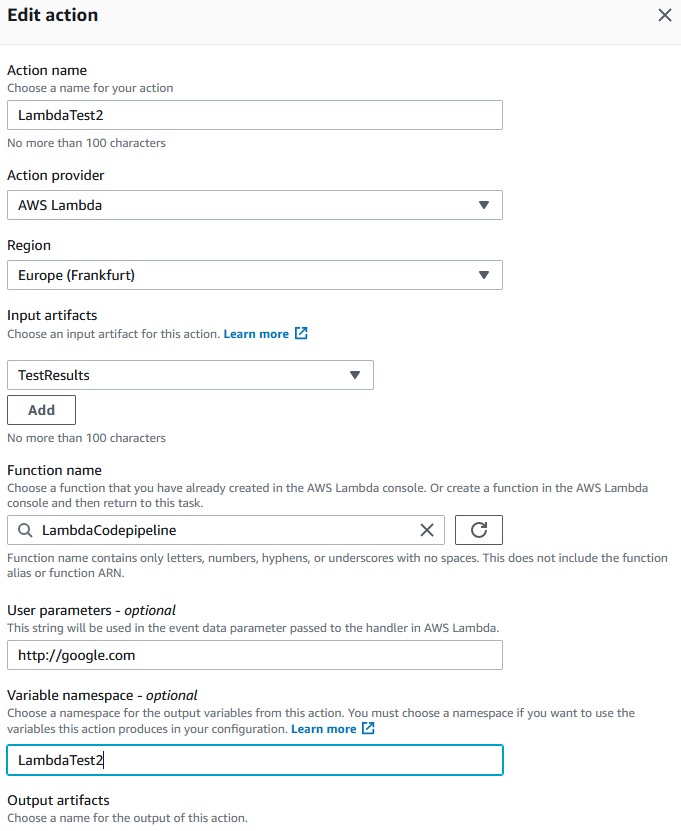
Done ->
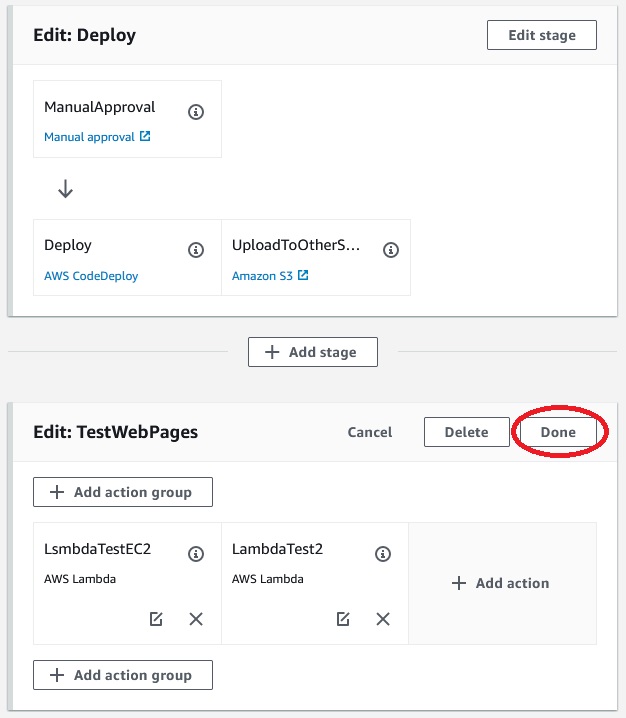
Done-> Save -> Release change -> Release
The pipeline has run and we see thad first test has succesed and the second test has failed because on the google.com site the wasn’t “congratulations” word.
References
- https://docs.aws.amazon.com/codepipeline/latest/userguide/reference-pipeline-structure.html#action-requirements
- https://docs.aws.amazon.com/codepipeline/latest/userguide/best-practices.html#use-cases
- https://docs.aws.amazon.com/codepipeline/latest/userguide/actions-invoke-lambda-function.html
- https://docs.aws.amazon.com/codepipeline/latest/userguide/actions-create-custom-action.html
- https://docs.aws.amazon.com/codepipeline/latest/APIReference/API_PutJobSuccessResult.html
- https://docs.aws.amazon.com/AWSCloudFormation/latest/UserGuide/continuous-delivery-codepipeline.html
- https://docs.aws.amazon.com/codepipeline/latest/userguide/tutorials-cloudformation.html
- https://github.com/aws-samples/codepipeline-nested-cfn
- https://aws.amazon.com/blogs/devops/implementing-gitflow-using-aws-codepipeline-aws-codecommit-aws-codebuild-and-aws-codedeploy/