


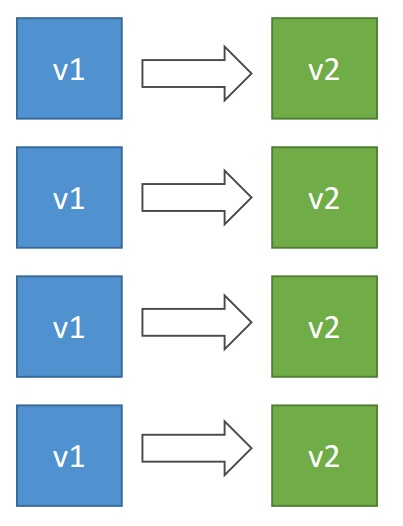
- We want to deploy our application automatically to many EC2 instances
- There are several ways to handle deployments using open source tools (Ansible, Terraform, Chef, Puppet, etc…)
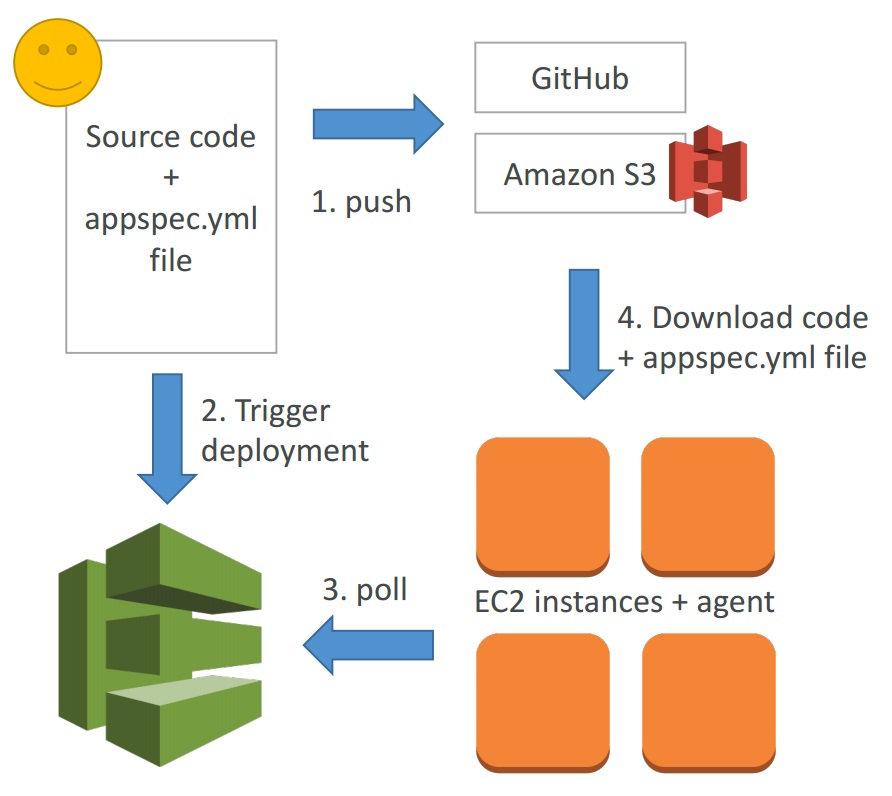
- We can use the managed Service AWS CodeDeploy
- Each EC2 Machine (or On Premise machine) must be running the
CodeDeploy Agent - The agent is continuously polling AWS CodeDeploy for work to do
- CodeDeploy sends
appspec.ymlfile. - Application is pulled from GitHub or S3
- EC2 will run the deployment instructions
- CodeDeploy Agent will report of success / failure of deployment on
the instance
- EC2 instances are grouped by deployment group (dev / test / prod)
- Lots of flexibility to define any kind of deployments
- CodeDeploy can be chained into CodePipeline and use artifacts from
there - CodeDeploy can re-use existing setup tools, works with any application,
auto scaling integration - Note: Blue / Green only works with EC2 instances (not on premise)
- Support for AWS Lambda deployments, EC2
- CodeDeploy does not provision resources
EC2 Setup
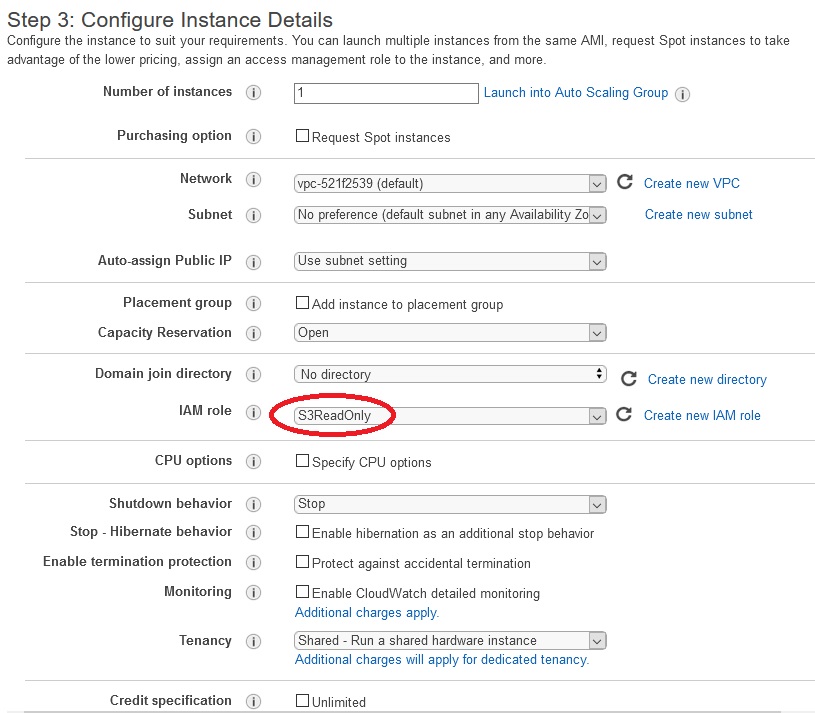
Because EC2 will read data from S3 we need to create and assign S3ReadOnly Role.
IAM -> Create role -> EC2 -> AmazonS3ReadOnlyAccess -> Next -> Review -> Role Name (S3ReadOnly) -> Create role
First we need to launch EC2 instance.
EC2 -> Launchh instance -> Amazon Linux 2 AMI (HVM), SSD Volume Type -> Select -> T2.micro -> Configure instance details ->
You can use existing key pair and default security group.
EC2 instance is running and we need to connect to it and install CodeDeploy agent. Choose your instance from list and click Connect

and then again Connect. 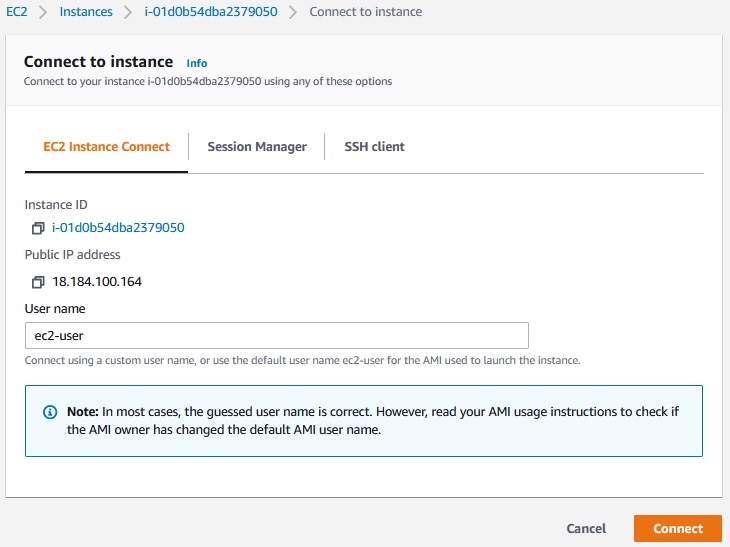
After you connect to the instance run following commands:
|
1 2 3 4 5 6 7 8 |
# Installing the CodeDeploy agent on EC2 sudo yum update -y sudo yum install -y ruby wget wget https://aws-codedeploy-eu-west-1.s3.eu-west-1.amazonaws.com/latest/install chmod +x ./install sudo ./install auto sudo service codedeploy-agent status |
This is the output:
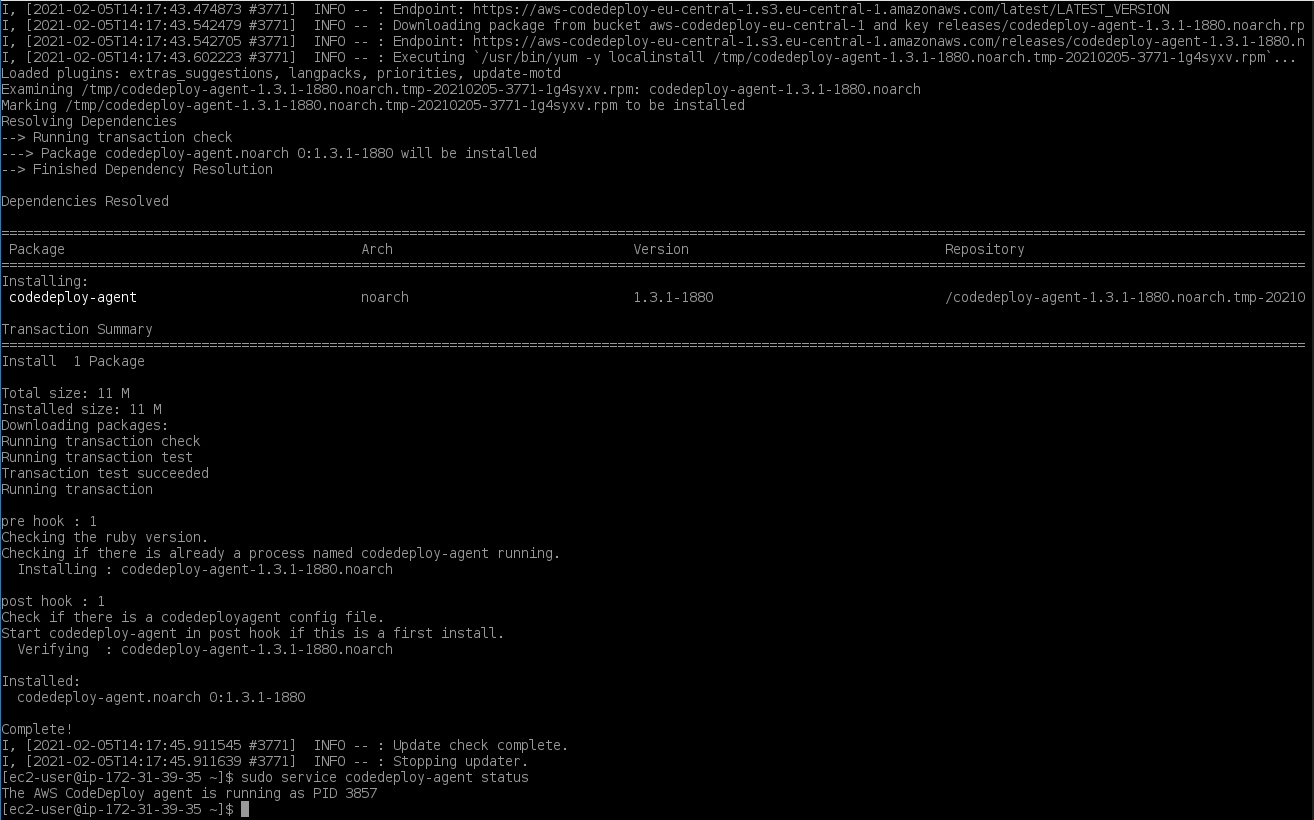
Codebuild agent has been installed and his proces id is 3857.
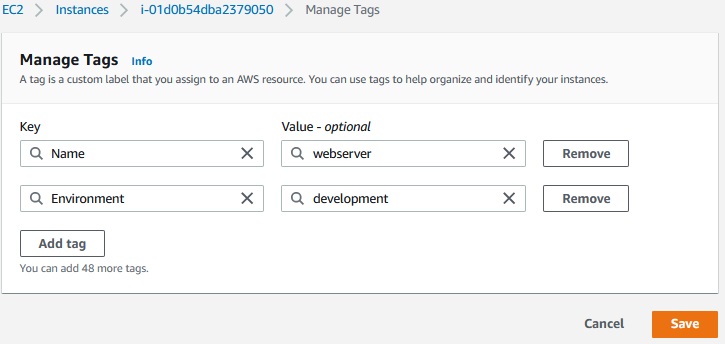
We also need to give a tags to the instance:
Application and Deployment Group
Create Application -> Application name [CodeDeployDemo] -> Compute platform [EC2/OnPremises] -> Create Application
First we need a role with CodeDeploy permissions that grants AWS CodeDeploy access to your target instances.
IAM -> Roles -> Create role -> CodeDeploy (Allows CodeDeploy to call AWS services such as Auto Scaling on your behalf) -> Next: Permissions ->
Also we need S3 bucket where deployment puts files:
|
1 2 3 4 5 6 7 8 9 10 |
C:\Users\mirth>aws configure --profile aws-devops AWS Access Key ID [None]: AKIA4HFREL3PLYD2XT7N AWS Secret Access Key [None]: 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 Default region name [None]: eu-central-1 Default output format [None]: json C:\Users\mirth>aws s3 mb s3://aws-devops-course-miro --region eu-central-1 --profile aws-devops make_bucket: aws-devops-course-miro C:\Users\mirth>aws s3api put-bucket-versioning --bucket aws-devops-course-miro --versioning-configuration Status=Enabled --region eu-central-1 --profile aws-devops |
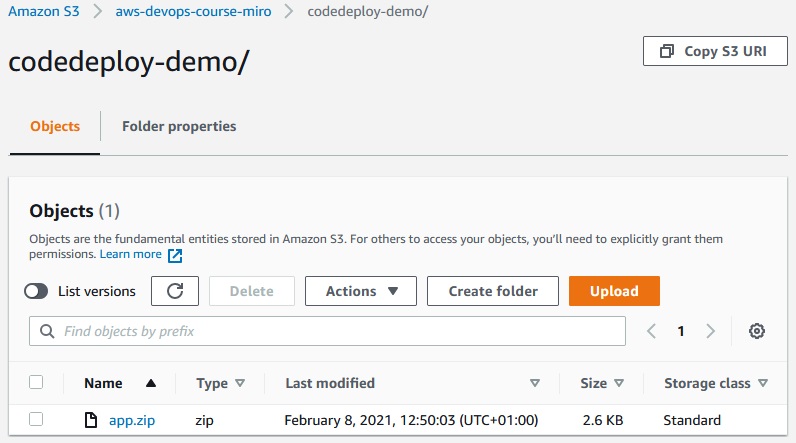
From inside my-webpage katalog we should zip and send files to the s3 bucket aws-devops-course-miro:
|
1 2 3 4 5 6 7 8 9 10 11 12 13 14 15 16 17 18 19 20 21 22 23 24 25 26 27 |
C:\Users\mirth>d: D:\>cd aws D:\AWS>cd code D:\AWS\code>cd my-webpage D:\AWS\code\my-webpage>dir Volume in drive D has no label. Volume Serial Number is 1DD6-4320 Directory of D:\AWS\code\my-webpage 2021-02-08 12:47 <DIR> . 2021-02-08 12:47 <DIR> .. 2019-09-12 16:46 570 appspec.yml 2019-09-12 16:46 501 buildspec.yml 2019-09-12 16:46 754 CODEDEPLOY.md 2019-09-12 16:46 717 index.html 2021-02-08 12:47 <DIR> scripts 4 File(s) 2 542 bytes 3 Dir(s) 84 782 022 656 bytes free D:\AWS\code\my-webpage> D:\AWS\code\my-webpage>aws deploy push --application-name CodeDeployDemo --s3-location s3://aws-devops-course-miro/codedeploy-demo/app.zip --ignore-hidden-files --region eu-central-1 --profile aws-devops To deploy with this revision, run: aws deploy create-deployment --application-name CodeDeployDemo --s3-location bucket=aws-devops-course-miro,key=codedeploy-demo/app.zip,bundleType=zip,eTag=5584c7b6bcad9c26a14492a3ecc773d0,version=QdMLpFvLcPUqvbB0mLlyNj6l0qIrhwAd --deployment-group-name <deployment-group-name> --deployment-config-name <deployment-config-name> --description <description> D:\AWS\code\my-webpage> |
As we see in the s3 bucket aws-devops-course-miro we now have files:
In order to create a new deployment, you must first create a deployment group.
Create Deployment Group -> Deployment group name [MyDevelopmentInstances] -> Service role [CodeDeployRole] -> Deployment type [In Place] -> Environment Configuration -> Amazon EC2 Instances -> Key Value [Environment Development] ->
We have 1 unique matched instance.
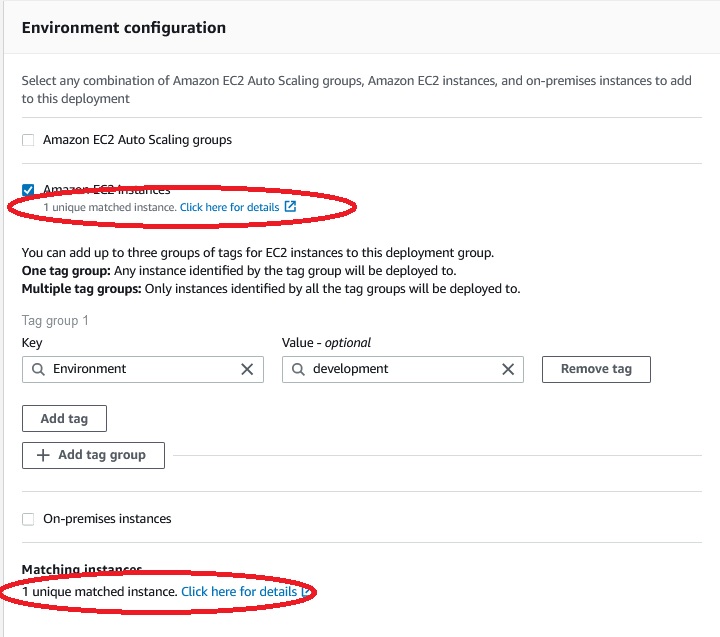
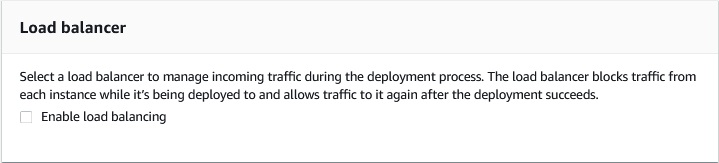
-> Deployment Configuration [CodeDeployDefaultAllAtOnce] -> Disable Load Balancing -> Create Deployment Group
Deployment group has been created and now we need a deployment.
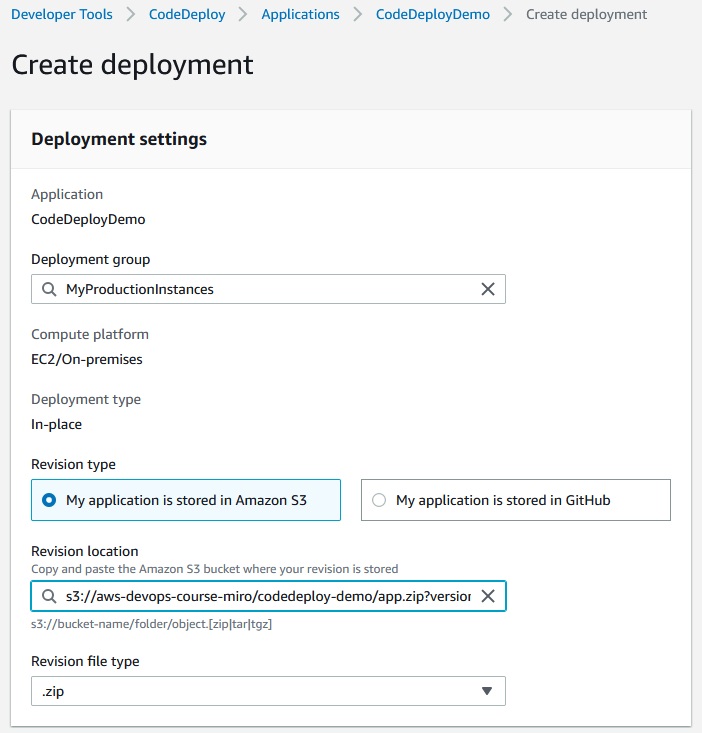
Create deployment -> Deployment group [MyDevelopmentInstances]
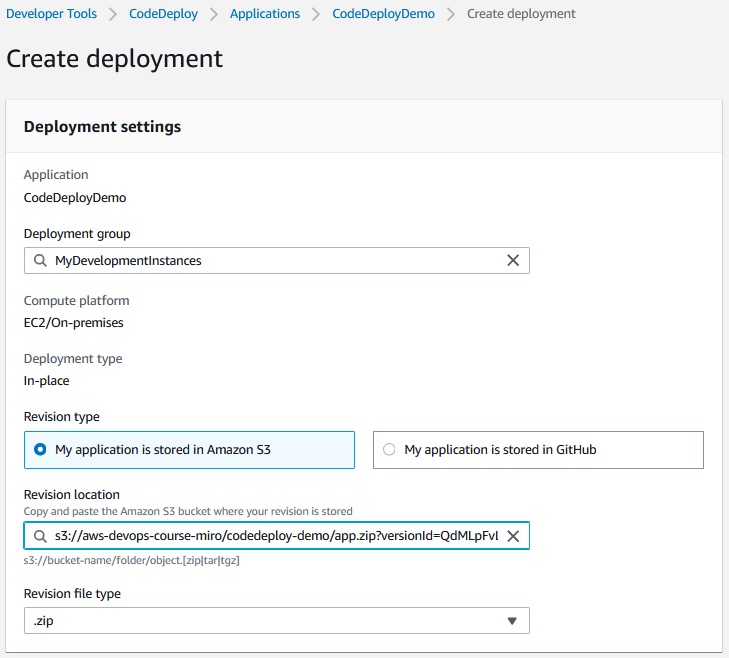
-> Create deployment.
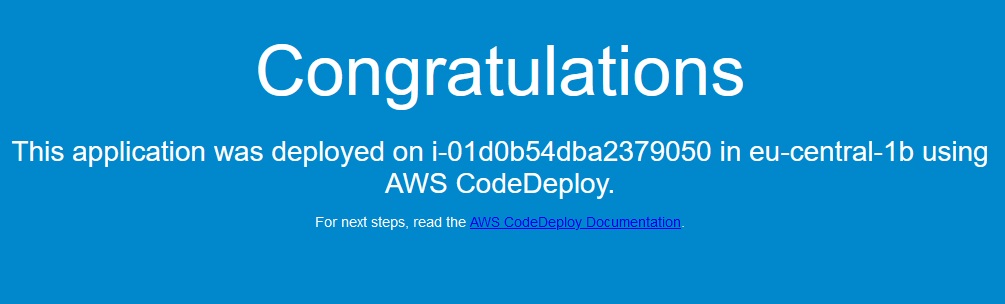
Deployment has been created.
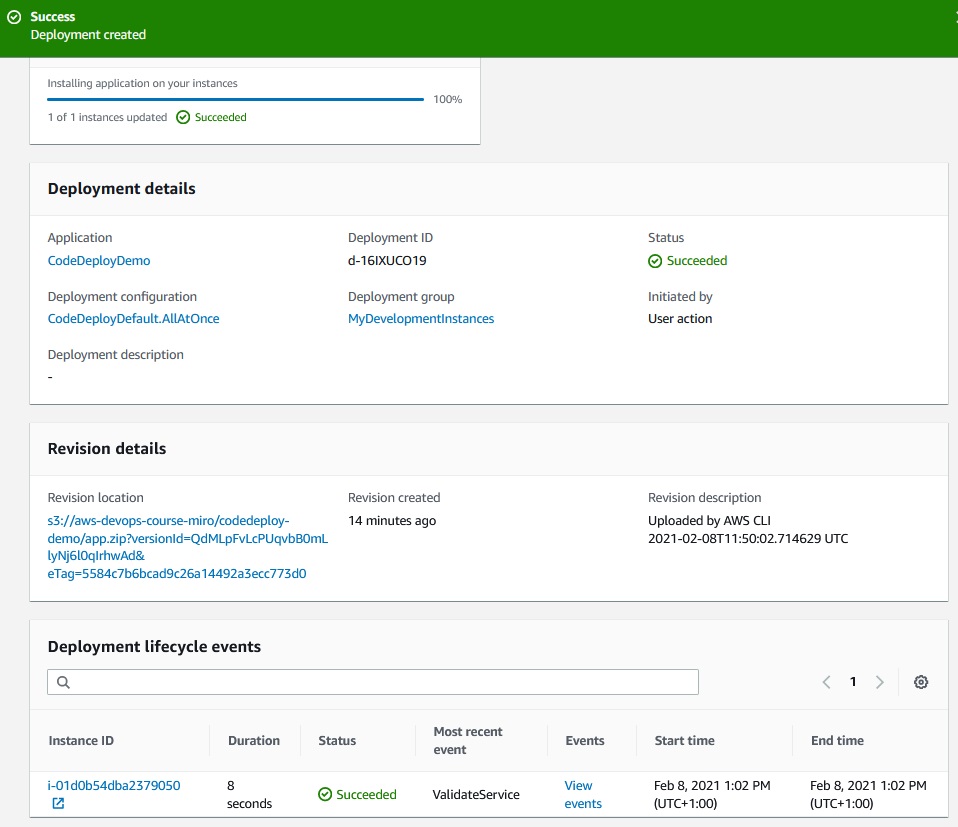
And application is running on the EC2 instance.
Additional deployment groups
We can launch more instances like which was launched before to create more deploment groups.
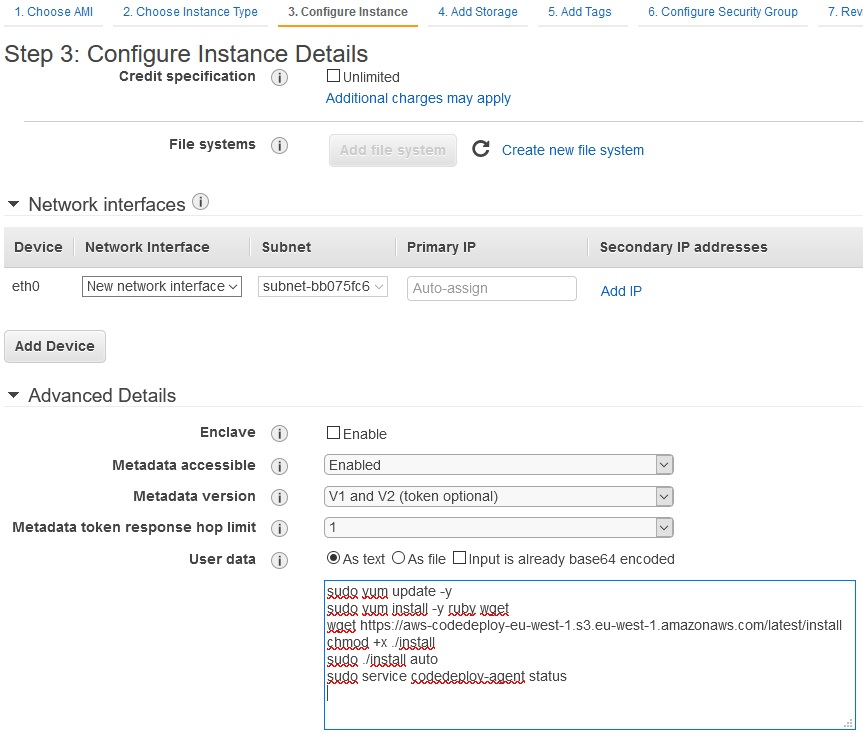
EC2 -> Actions -> Image and templates -> Launch more like this -> Edit instance details -> Number of Instances [4] -> in User data ->
|
1 2 3 4 5 6 |
sudo yum update -y sudo yum install -y ruby wget wget https://aws-codedeploy-eu-west-1.s3.eu-west-1.amazonaws.com/latest/install chmod +x ./install sudo ./install auto sudo service codedeploy-agent status |
-> Review and Launch -> Launch -> Choose key pair
Modify tags for three of running instances. Three instances must have “environment -> production” tags and two of them “development” tags.
Go to the CodeDeploy and run new deployment group for application CodeDeployDemo.

The same role:
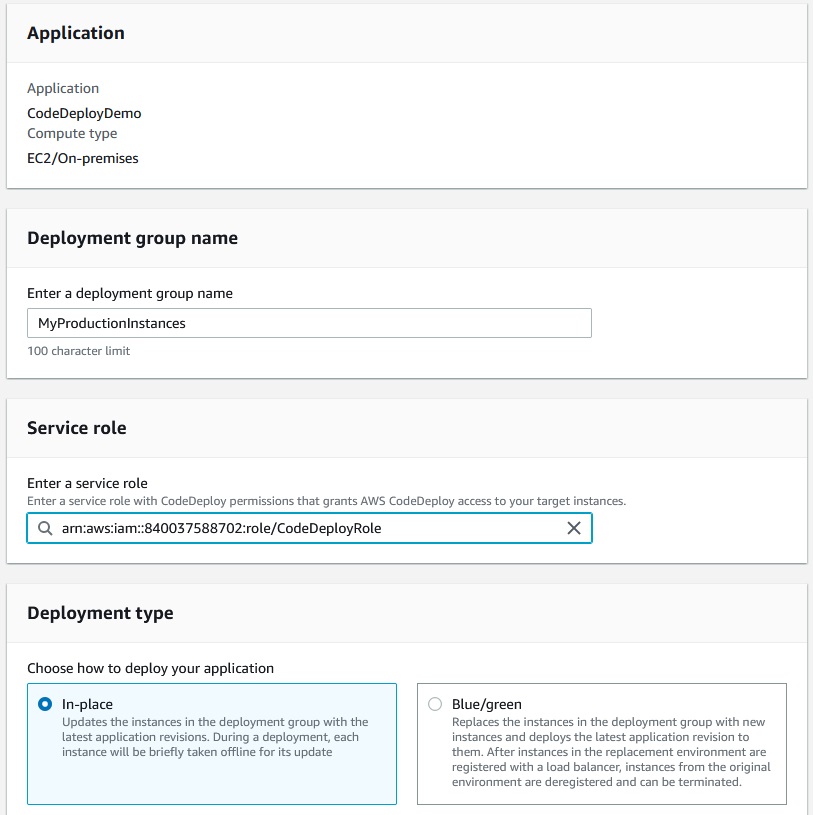
Add to deployment group instances tagged as production:
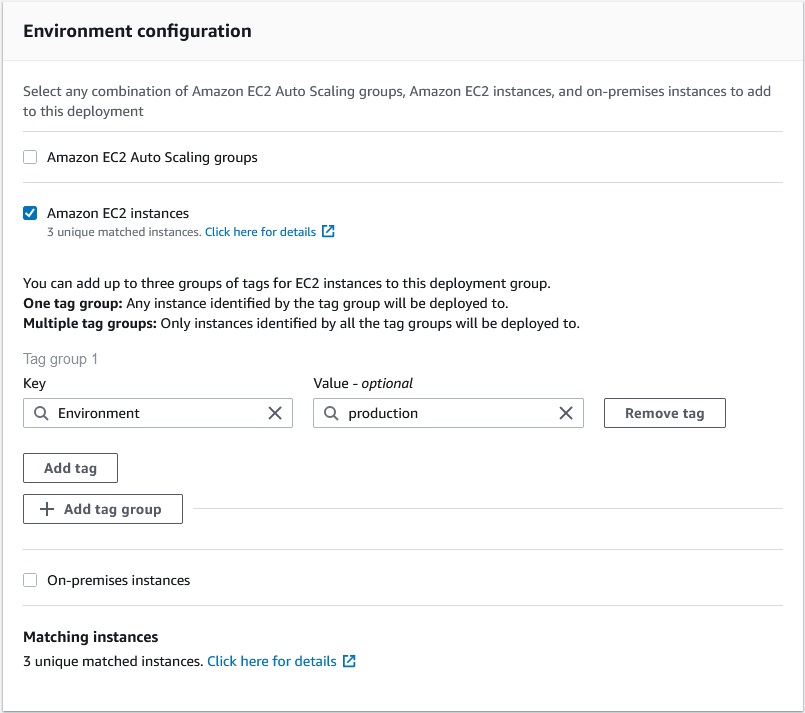
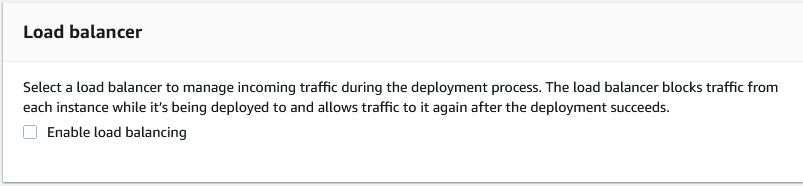
Remove load balancer and click on Create deployment group
Now we have 2 deployments group for application :
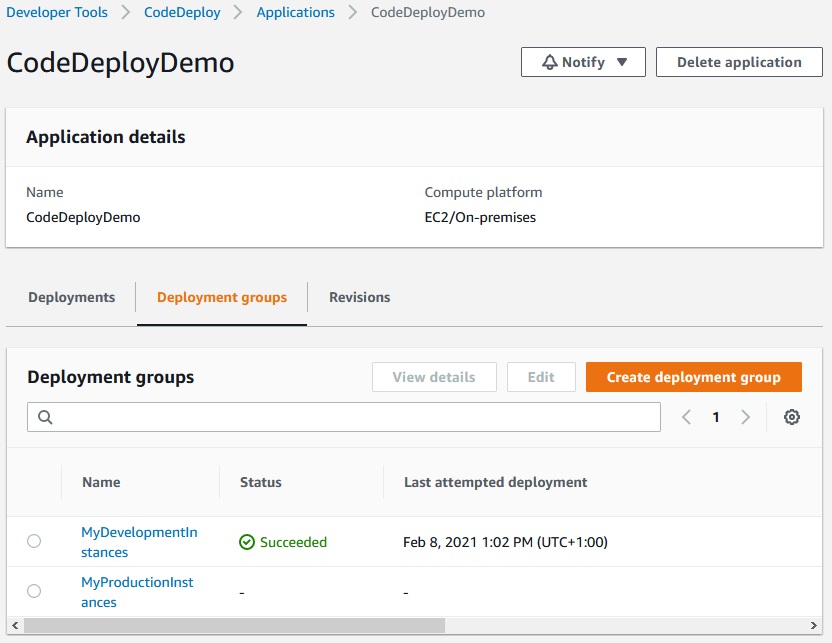
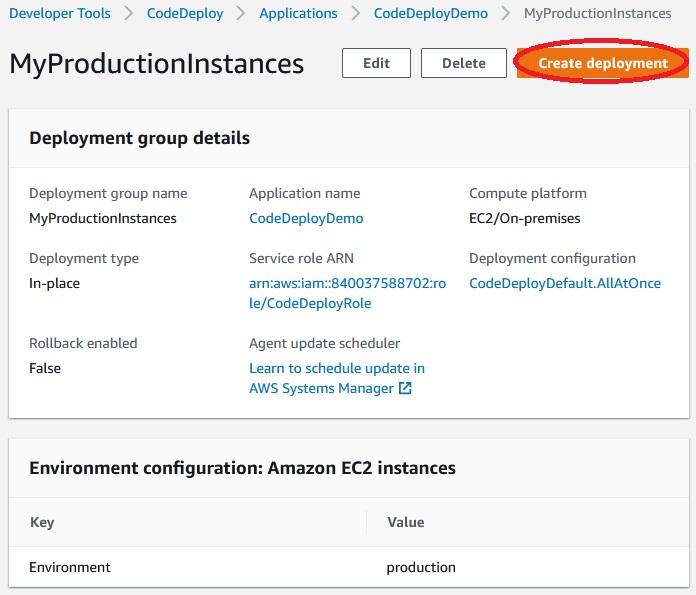
Now let’s deploy the application o new deployment group:
We have problem in deployment:

So in the deplyments settings we need to change the configuration:
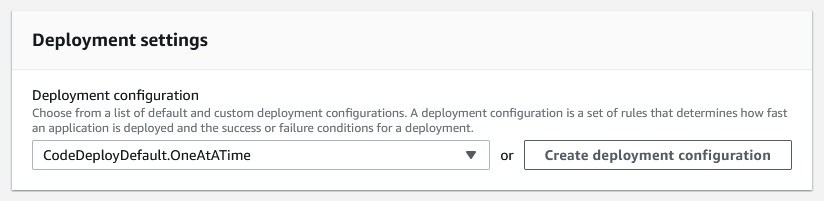
After we change this setting we should again create deployment:
Appspec.yml file.
On the deployment we used such an appsppec.yml file:
|
1 2 3 4 5 6 7 8 9 10 11 12 13 14 15 16 17 18 19 20 21 22 23 24 25 |
version: 0.0 os: linux files: - source: /index.html destination: /var/www/html/ hooks: ApplicationStop: - location: scripts/stop_server.sh timeout: 300 runas: root AfterInstall: - location: scripts/after_install.sh timeout: 300 runas: root BeforeInstall: - location: scripts/install_dependencies.sh timeout: 300 runas: root ApplicationStart: - location: scripts/start_server.sh timeout: 300 runas: root ValidateService: - location: scripts/validate_service.sh timeout: 300 |
Files section means that de deploy will copy index.html file to the /var/www/html destination.
ApplicationStop hook:
|
1 2 3 4 5 |
#!/bin/bash isExistApp=`pgrep httpd` if [[ -n $isExistApp ]]; then service httpd stop fi |
Check if httpd proces is running. If yes the stop it.
AfterInstall hook:
|
1 2 3 4 5 |
#!/bin/bash EC2_INSTANCE_ID=$(curl -s http://169.254.169.254/latest/meta-data/instance-id) EC2_AZ=$(curl -s http://169.254.169.254/latest/meta-data/placement/availability-zone) sed -i "s/was deployed/was deployed on $EC2_INSTANCE_ID in $EC2_AZ/g" /var/www/html/index.html chmod 664 /var/www/html/index.html |
Copy instance id and instance availability zone from instance metadata. Puts info to the index.html file. Change the permissons to the index.html file.
BeforeInstall hook:
|
1 2 |
#!/bin/bash yum install -y httpd |
Install apache server.
ApplicationStart hook:
|
1 2 |
#!/bin/bash service httpd start |
Starts apache serwer.
ValidateService hook:
|
1 2 3 |
#!/bin/bash # verify we can access our webpage successfully curl -v --silent localhost:80 2>&1 | grep Congratulations |
Check if on the local web server there is “Congratulations” word.
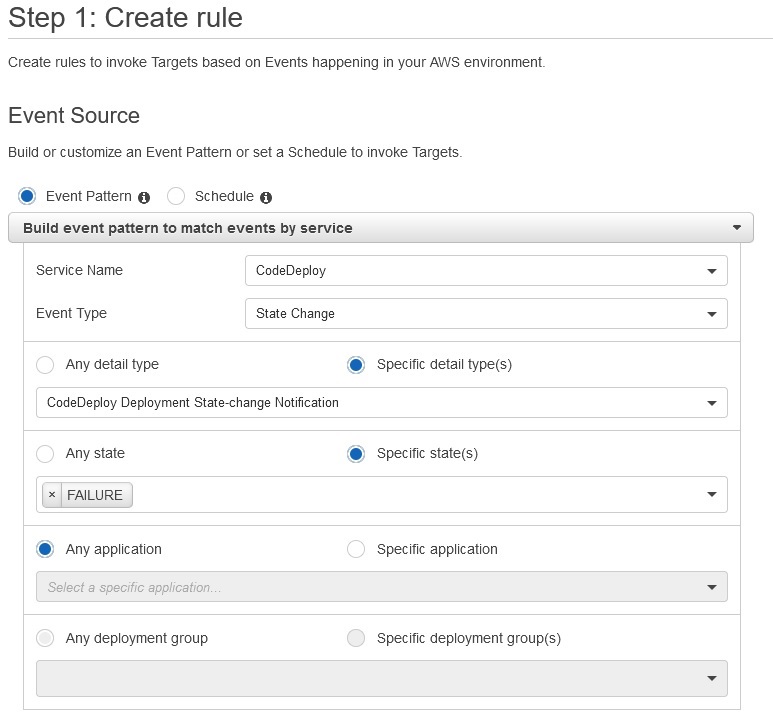
Monitoring deployments with Amazon CloudWatch Events
You can use Amazon CloudWatch Events to detect and react to changes in the state of an instance or a deployment (an “event”) in your CodeDeploy operations.
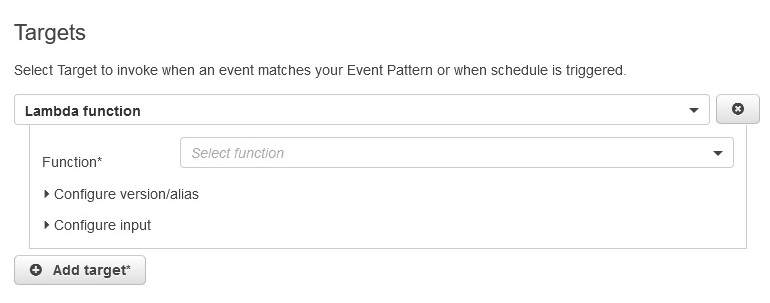
CloudWatch -> Events -> Rules -> Create rule
First you need to create a Lambda function to pass a notification to a Slack channel whenever deployments fail and then:
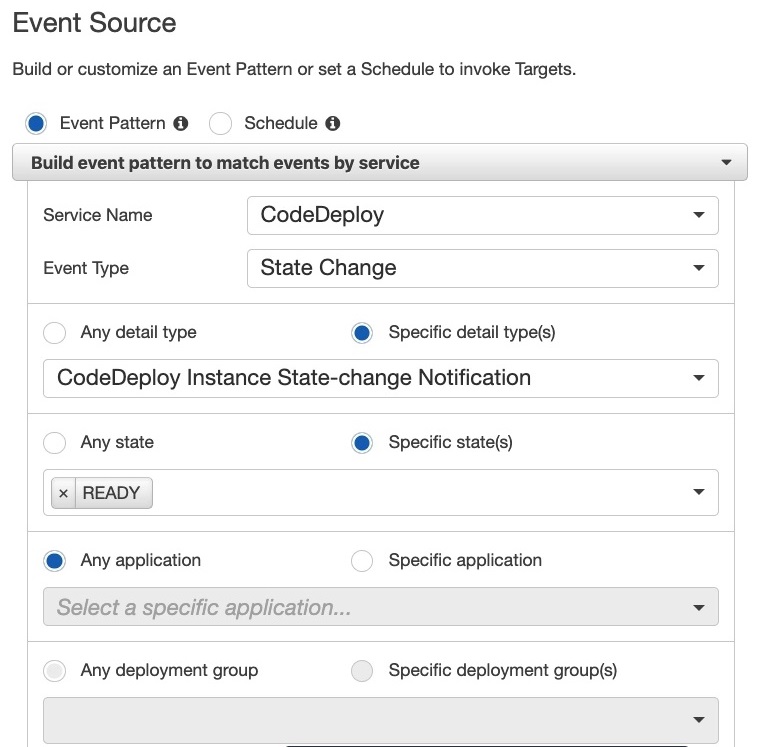
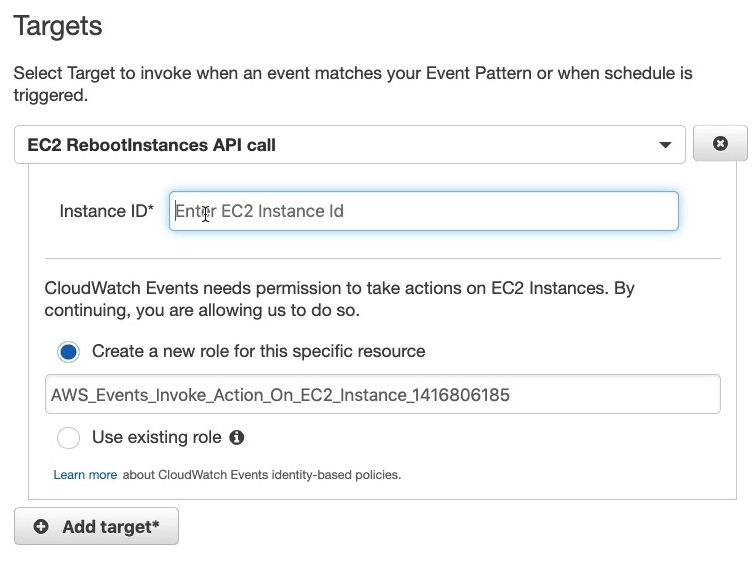
We can use CloudWatch alarm actions to automatically stop, terminate, reboot, or recover Amazon EC2 instances when a deployment or instance event you specify occurs.
Monitoring deployments with SNS.
You can add triggers to a CodeDeploy deployment group to receive notifications about events related to deployments or instances in that deployment group. These notifications are sent to recipients who are subscribed to an Amazon SNS topic you have made part of the trigger’s action.
Developer Tools -> CodeDeploy -> Applications -> CodeDeployDemo -> MyProductionInstances -> Edit -> Advanced - optional -> Create Trigger
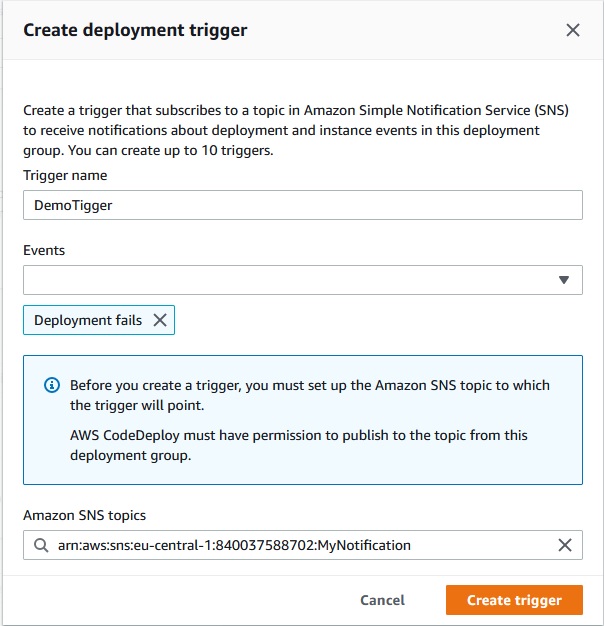
Create trigger ->
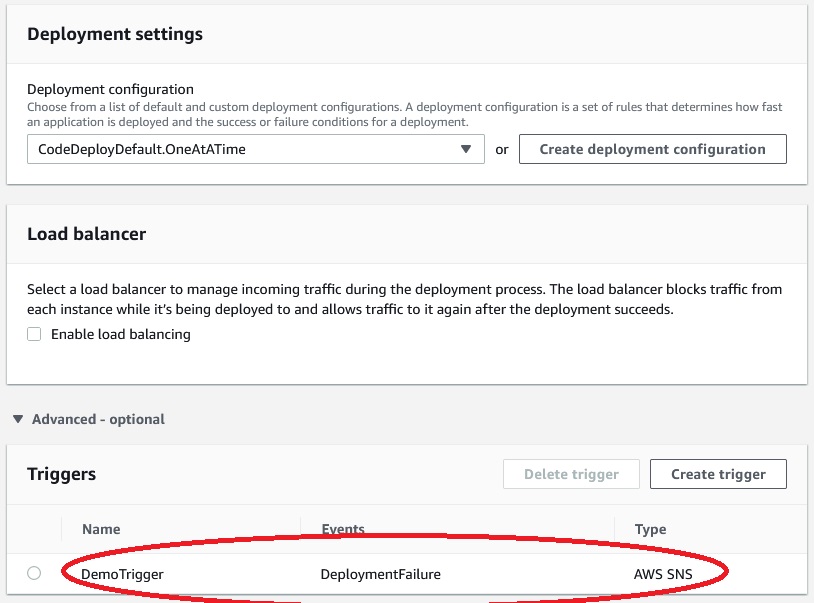
Save Changes ->
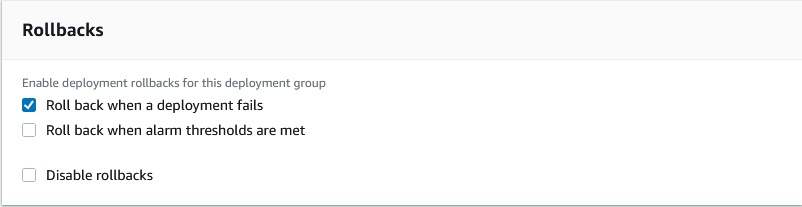
Rollbacks.
You can configure a deployment group or deployment to automatically roll back when a deployment fails or when a monitoring threshold you specify is met.
Developer Tools -> CodeDeploy -> Applications -> CodeDeployDemo -> MyProductionInstances -> Edit -> Advanced - optional
If we want to rollback only when a deploments fails we should use such a configuration:
If we want to rollback based on alarm thresholds:
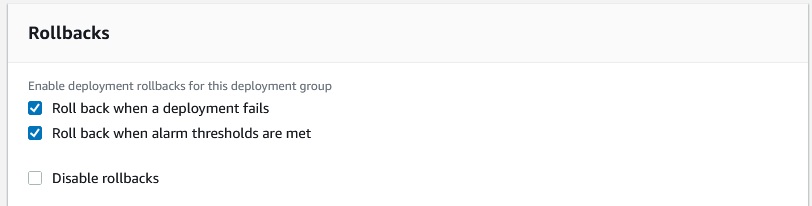
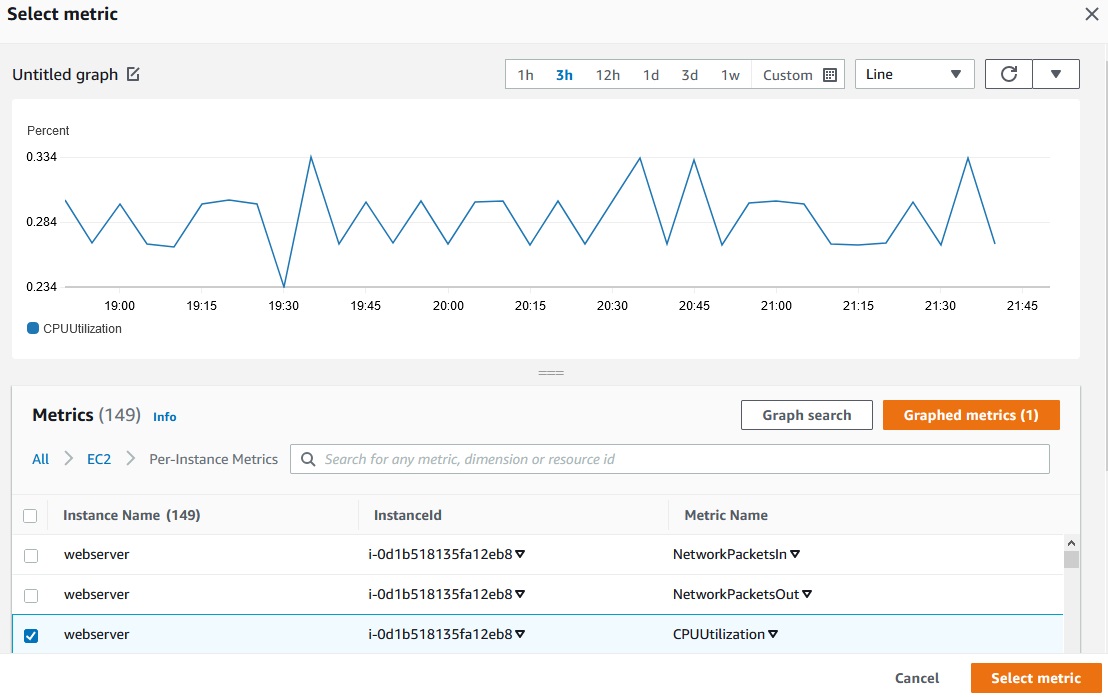
We should create an CloudWatch alarm first:
CloudWatch -> Alarms -> Create alarm -> Select metric -> EC2 -> Per instance -> CPUUtulization -> Select metric
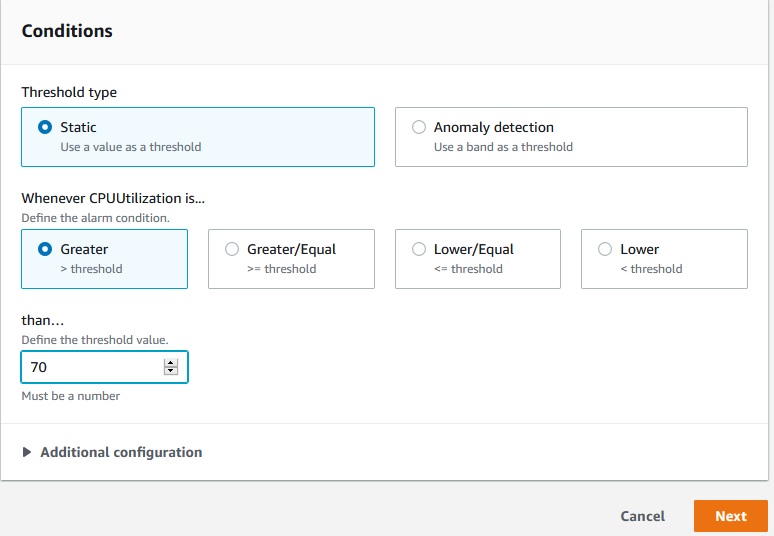
Conditions -> Grater than 70 -> Next
Choose a SNS Topic:

Next ->

Create alarm ->
After we have created an alarm we can add it to alarms:
Add alarm ->
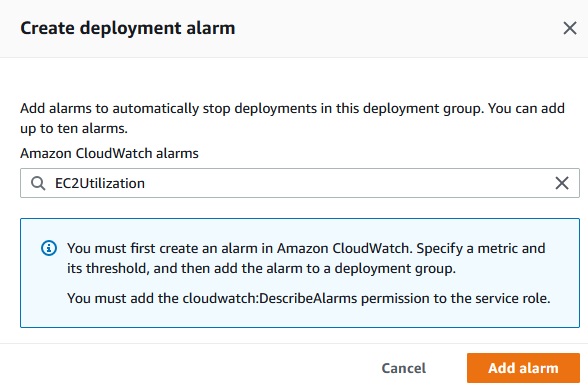
Add alarm -> X
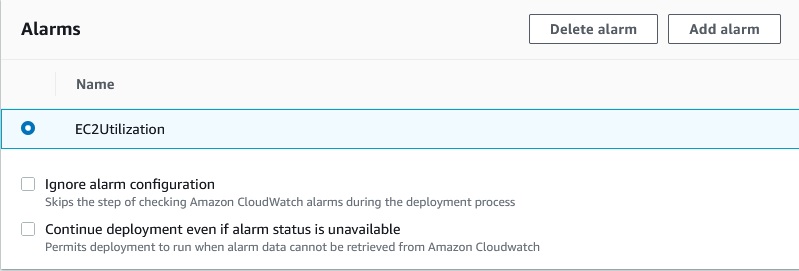
If alarm goes up the deployment will be rolled back.
Save changes ->
On-Premise Instances Setup
An on-premises instance have to run the CodeDeploy agent and connect to public AWS service endpoints.
Deploy to AWS Lambda
Developer Tools -> CodeDeploy -> Applications -> Create application
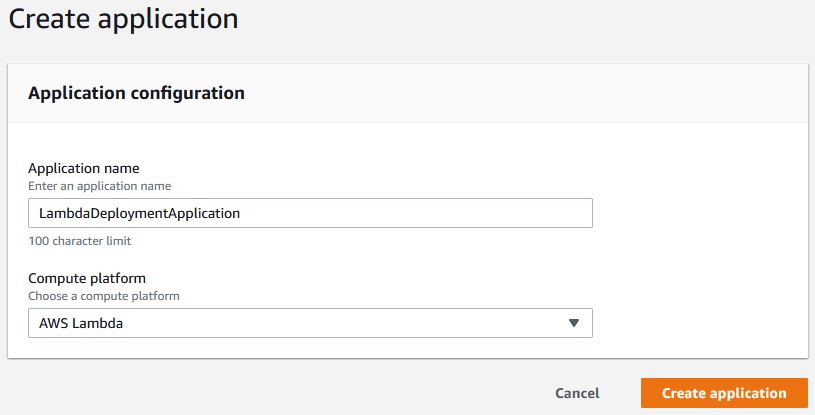
-> Create application
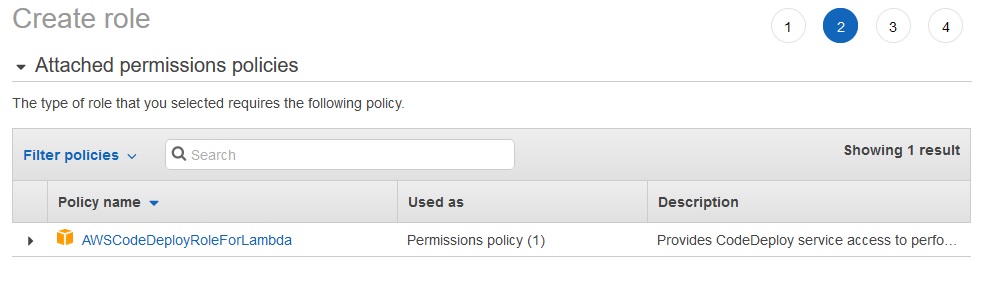
Now we need to create a specific role for CodeDeploy to Lambda.
IAM -> Roles -> Create role -> CodeDeploy -> CodeDeploy for Lambda -> Next: Permissions
Next: Tags -> Next: Review
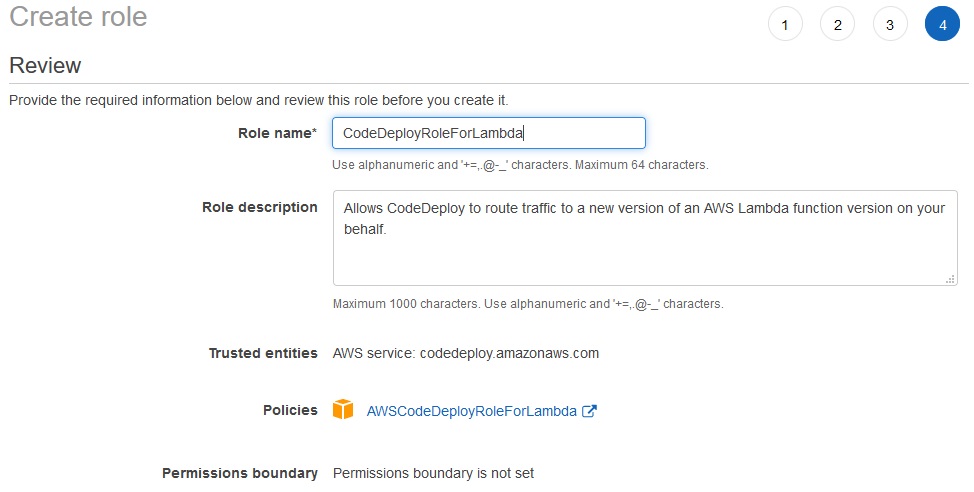
Create role ->
Developer Tools -> CodeDeploy -> Applications -> LambdaDeploymentApplication -> Create deployment group
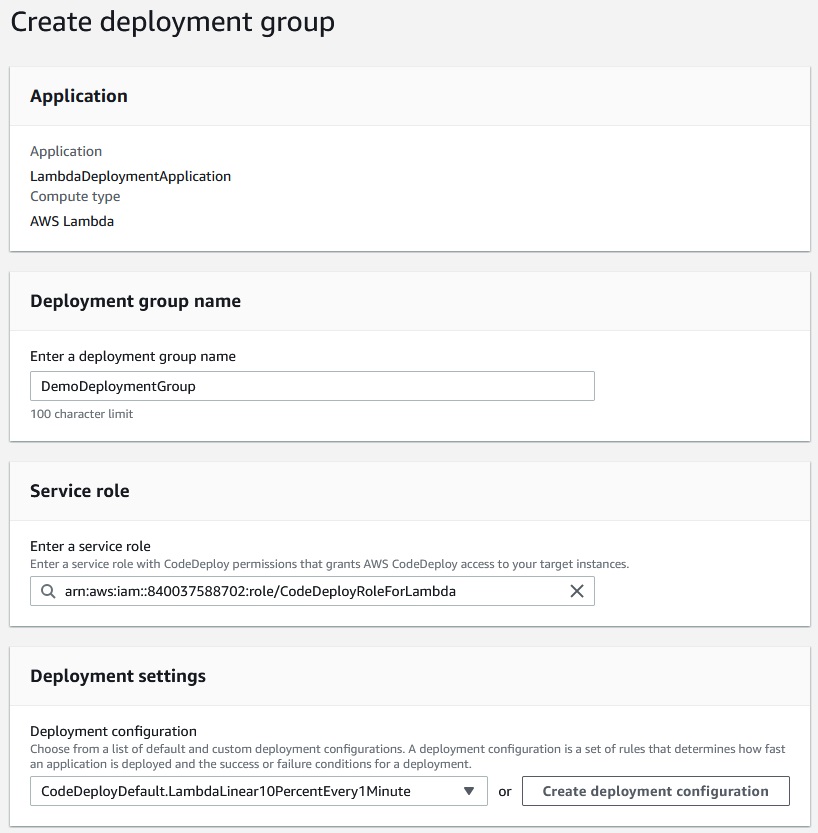
Create Deployment Group ->
References
- https://docs.aws.amazon.com/codedeploy/latest/APIReference/API_MinimumHealthyHosts.html
- https://docs.aws.amazon.com/codedeploy/latest/userguide/reference-appspec-file-structure-hooks.html
- https://docs.aws.amazon.com/codedeploy/latest/userguide/reference-appspec-file-structure-hooks.html#appspec-hooks-server
- https://docs.amazonaws.cn/en_us/codedeploy/latest/userguide/reference-appspec-file-structure-hooks.html#reference-appspec-file-structure-environment-variable-availability
- https://docs.aws.amazon.com/codedeploy/latest/userguide/monitoring-cloudwatch-events.html
- https://aws.amazon.com/blogs/devops/view-aws-codedeploy-logs-in-amazon-cloudwatch-console/
- https://docs.aws.amazon.com/codedeploy/latest/userguide/monitoring-sns-event-notifications.html
- https://docs.aws.amazon.com/codedeploy/latest/userguide/deployments-rollback-and-redeploy.html
- https://docs.aws.amazon.com/codedeploy/latest/userguide/deployment-groups-configure-advanced-options.html
- https://docs.aws.amazon.com/codedeploy/latest/userguide/instances-on-premises.html
- https://docs.aws.amazon.com/codedeploy/latest/userguide/register-on-premises-instance-iam-user-arn.html
- https://docs.aws.amazon.com/codedeploy/latest/userguide/register-on-premises-instance-iam-session-arn.html
- https://docs.aws.amazon.com/codedeploy/latest/userguide/deployment-configurations.html#deployment-configuration-lambda
- https://docs.aws.amazon.com/codedeploy/latest/userguide/reference-appspec-file-structure-hooks.html#appspec-hooks-lambda